How to Import Google Takeout to External Drive?

Overview: If you want to import your Google Takeout data to an external drive, then this blog will help you achieve your goals. The writing also mentions reasons and the most efficient way users can import Google Takeout data. The blog will clear all doubts related to “how to download google takeout to external hard drive?“
Google Takeout: Google Takeout is a data export service by Google that helps users export all their data from their Google account. This works when a user sends a request to the users using this app. Google then sends a link through email, which can be used to download the said data. Users will receive emails within hours or days, depending on the data stored and requested.
Please note- If you plan to import Google Takeout to external drive or USB drive, then connect it to your PC and ensure that it is detected by your system.
Why Import Google Takeout to External Drive?
- Data backup: Users can create data backups, which can act as a safeguard against accidental and emergency situations like data loss and deletion. Additionally, storing data on an external device makes it better, in case any virus or system failure can’t harm the data stored externally.
- Offline access: Extracting Google Takeout to an external backup can also act as offline access to your data, which enables the user to be flexible and not be dependent on internet connectivity.
- Free up cloud storage: A Google account has 15 GB free personal cloud storage, which will eventually fill up. Therefore, extracting the data stored on external storage becomes an efficient way to free up the cloud storage.
- Data analysis: Extracting email data for efficient analysis, like creating a custom audience list and analyzing customer feedback. This can be difficult in an online platform. Creating an offline backup can help streamline the process.
Phase 1: Export Data From Google Takeout
- Search “Google Takeout” on your device and log in to your Google account.

- Select only the “mail option“, click “next step“.

- Choose the “Send download link via email” option.

- In the Customize archive format choices, pick .zip

- Select any archive size and tap on the Create archive tab.

- The process will starts now, you will receive data on email.

- Once it finishes, visit your Gmail, click on the “Download archive” option to save the email content.

- In the Google archives folder, extract the downloaded files to any saving location.

- Open this location to import Google Takeout to external drive.


Limitation: With the traditional method of Google Takeout, you can download Google emails to computer only in the default format there is no direct way to convert them. Secondly, you can make a few archives per day.
Transfer Data from Google Takeout to Hard Drive Efficiently
If you try the manual way to import Google Takeout to external drive. Then, you need to take care that the data is correct. Also, the downtime involved in such a method may not meet the deadlines of the migration.
Hence, the best approach to import Google Takeout to external drive is to use an automated software solution. BitRecover Google Takeout Converter, as the name implies, gives an instant way to import all data from Google Takeout account to external hard drive.
Phase 2: Import Google Takeout to External Device
- Download and Launch The Software
- Now, select the MBOX files or folder from your database.

- Thereafter, you can choose all files or some selective data for the migration task.
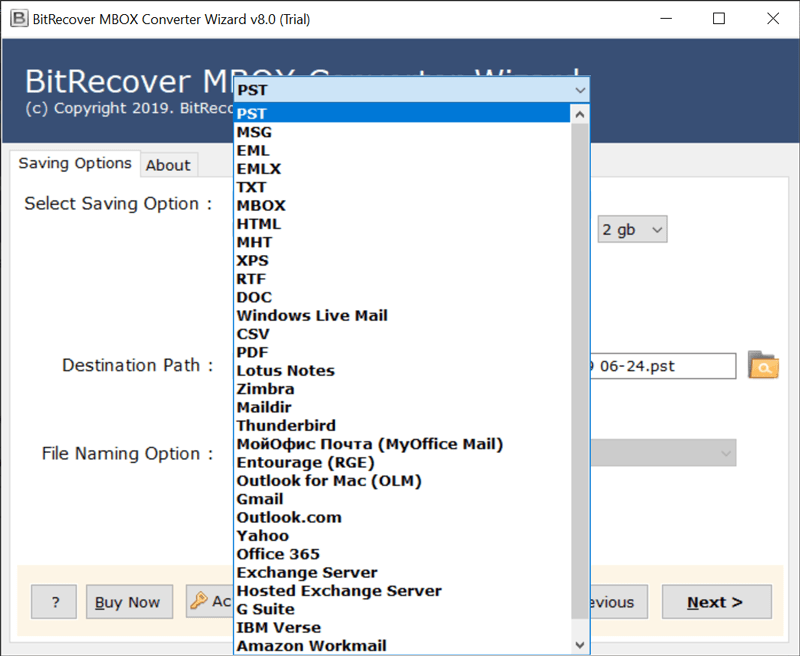
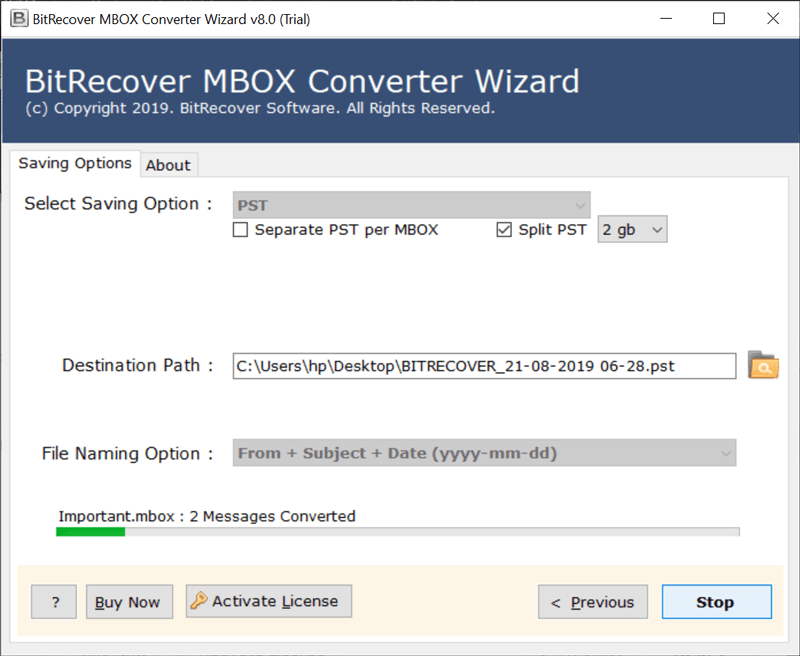
- Next, navigate to the saving options list and select your desired saving formats.
- Then, select your external device as your “Destination Path” to download Google Takeout to external drive.

- Lastly, tap on the convert button to begin the migration.
- Your data will be successfully transferred to the external drive.


What are the Benefits of this Software?
- Multi-format saving: Users can save their Google Takeout emails in multiple formats from the 30+ saving options.
- Batch conversions: Users can convert multiple email backups from various accounts at once. No requirement to repeat the process for each account
- Complete data accuracy: The conversion process is 100% data accurate. This means no data will be lost or altered during conversion.
- Folder hierarchy: The conversion process will maintain the complete folder hierarchy, meaning the data files will be stored in the same way it was stored before.
Frequently Asked Questions
Q1: What is Google Takeout?
Ans. Google Takeout is the service provided by Google for users to export their data from their Google account.
Q2: In what format are emails extracted in Google Takeout?
Ans. Users can receive their data through Gmail, on Drive, etc., in ZIP or RAR format. When a user extracts them, the email data will be in MBOX format.
Q3: How much time will it take to receive data through email?
Ans. If the user is receiving data through the link in the email, then it will depend on the data size. The process can take a long time (possibly hours or days) to complete. You’ll receive an email when your export is done.
Conclusion
Through this blog post, we have outlined the whole process to import Google Takeout data to external hard drive. Users can also check out the free demo version to test the potential of this application. It enables migrating a few emails at once. To do unlimited migration, purchase the license keys.
