How to Block an Email Address on Apple Mail with Safety?

Published: March 12th, 2026 • 7 Min Read
Email communication has become an important part of both personal and professional life. It is used for work updates, online services, or some personal communications. As the application comes pre-installed on macOS, iOS, iPadOS, it has become one of the most widely used email clients among the Apple users.
However, while using Apple Mail many users start receiving emails from unknown senders, marketing campaigns, or spam sources that makes the inbox cluttered. These unwanted emails not only reduce productivity but also risk the security and privacy of your data with through phishing attempts and malicious attachments. The mailbox becomes so cluttered that sometimes Apple Mail may even stop working.
To manage such situations we really need to find an answer to how to block an email address on Apple Mail to keep the entire Apple Mail emails, attachments, and other mailbox data safe and secure. Let us move forward to first understand the brief reasons to block email senders in Apple Mail.
Reasons to Block an Email Sender on Apple Mail
There are several reasons that blocking an email address becomes a necessity. Some of the most common ones are mentioned below:
- Avoid Spam Emails: Many marketing agencies and companies send their promotional emails repetitively, that can quickly fill your inbox.
- Prevent Phishing Attempts: By blocking such suspicious senders protects you and your data from fraudulent and phishing emails.
- Reduce Inbox Clutter: Blocking unwanted email senders helps keep mailboxes well organized and clutter-free without much effort.
- Stops Harassment: If a user receives unwanted and disturbing emails, blocking a user ensures they cannot contact you again.
- Improves productivity: A clean inbox helps you to access all emails smoothly and focus on work-related communications with ease.
How to Block an Email Address on Apple Mail on Apple Devices?
No matter if you want to block an email address on Mac Mail, iPhone, iPad, or Mac Machines allow you to complete this process, with in-built settings.
Block Email Sender on Mac (for iPhone Users)
If you are using Mac Mail on your iPhone and want to block an email sender directly below are the steps:
- Start with opening Mail app on iPhone.
- Locate an email from the sender you want to block and open it.
- Tap on the sender’s email address at the top of the message.
- Tap on the email sender’s contact card.
- Now, select Block this Contact.
- After that, confirm the action when prompted.
Once the sender is blocked, emails from that particular sender will automatically move to the trash folder.
Block Email Sender on Mac (for iPad Users)
The process of blocking an email address on iPad is very similar to the process of iPhone.
- First start the Mail app on your iPad.
- Now, open the email by the sender you want to block.
- Click on the sender’s name or email address at the top.
- Now, open the contact card of the sender.
- Click on Block this Contact option.
- When the pop-up arrives, confirm the blocking action.
Once the process is done, the sender will be added to the block list.
Block Email Sender in Apple Mail (for Mac Users)
It is very easy for the Mac users to block a particular sender directly.
- Open the Mail app on your Mac Machines.
- Select the email from the sender you want to block permanently.
- Now, click the arrow next to the sender’s name in the message header.
- Choose Block Contact from the dropdown menu options.
Once you have blocked the sender, whenever you receive the email in future from that particular sender, it will be marked as blocked.
Professional Solution to Block an Email Address on Apple Mail
Sometimes, blocking an email address can just stop future messages from reaching your Inbox folder, but it does not help you to manage the existing emails in your mailbox. In such situations, users generally look for a reliable and safe solution to manage, backup, and organize the Mac Mail data.
BitRecover Apple Mail Converter is one of the best solutions that helps users to simplify the Apple Mail management with ease. It allows users to export their mailbox emails, attachments and other associated data into multiple file formats such as, PST, PDF, EML, MBOX, HTML, etc. that even helps you to migrate data into Gmail, Outlook, Thunderbird etc. Below are the direct links to download the demo version of this solution to test it first before choosing the licensed version to export data completely.
Quick Steps to Use this Professional Solution on a Mac Machine
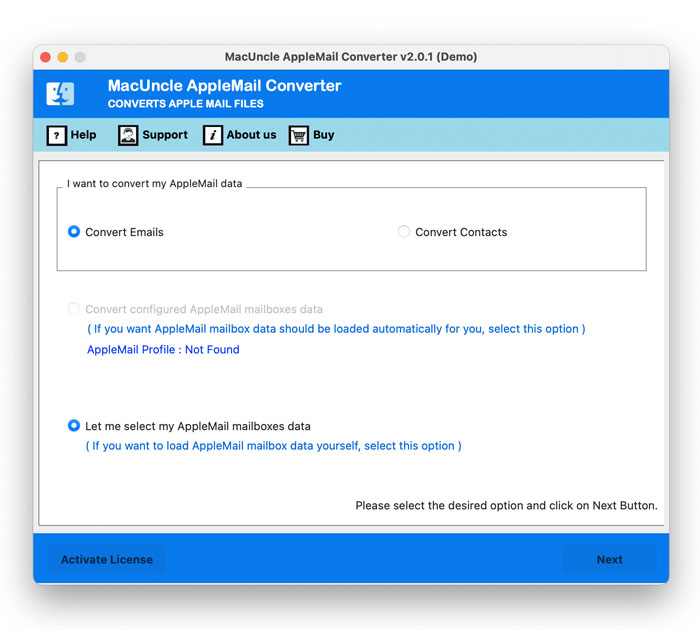
- Download and open the solution on Mac Machine to start the process and choose preferred option upload data.

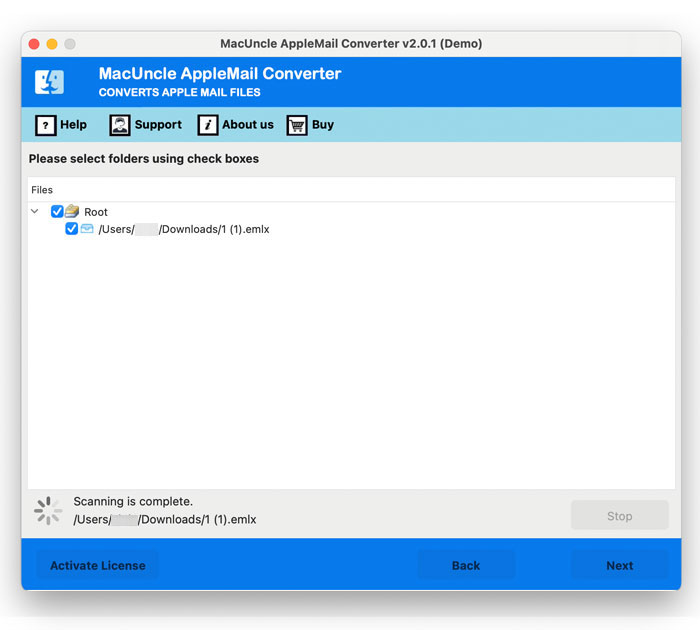
- Once the data is loaded in your Apple Mail data, preview all the data carefully to proceed further.
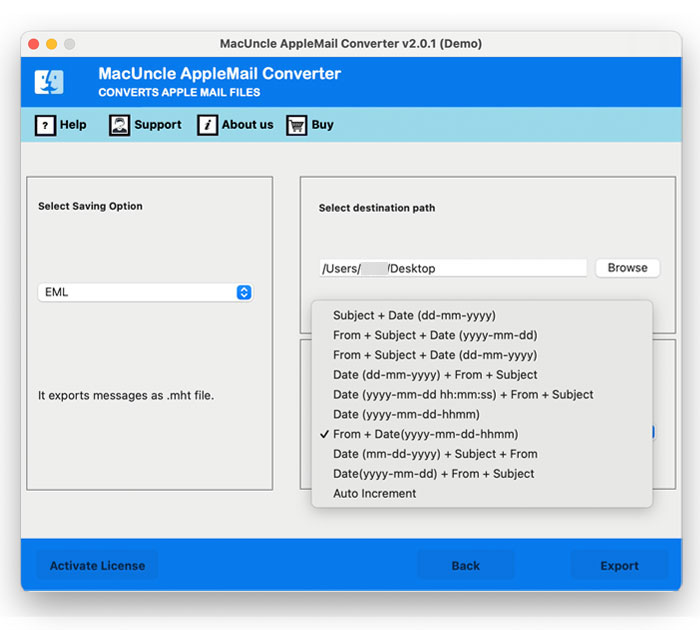
- After that, choose a File Format, a Destination Location and an option from File Naming Options.
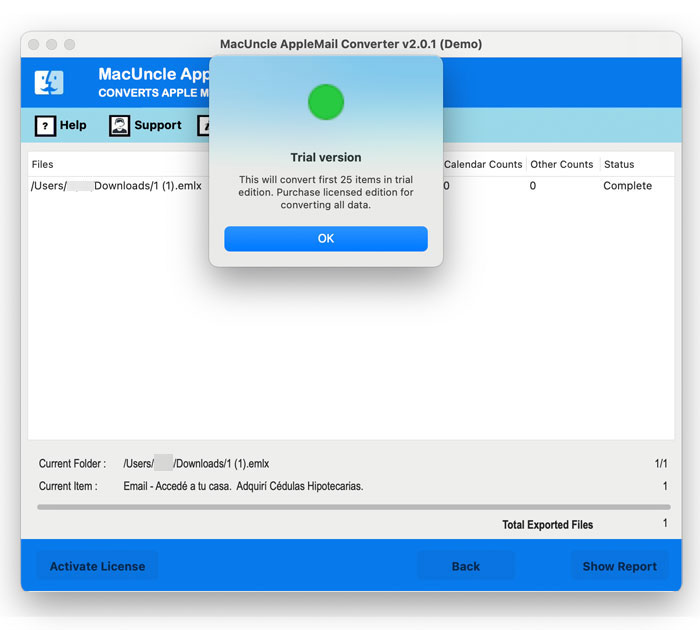
- At last, click on the Export button to backup Apple Mail data for multiple uses.
Quick Steps to Use this Software on Windows System
- Start with downloading and installing the software on your Windows system.

- Now, choose Select Files and Select Folders to load Mac Mail data into the software panel.
- After that, preview and check all the uploaded data to proceed further.
- Now choose a file format to backup and save all your important emails along with attachments in your storage.
- Finally, choose the Destination Path and a name from File Naming Option list.
- Apply Advanced Filters from Filter options section if required.
- Lastly, proceed with clicking on the Convert button for an accurate result.


Powerful Capabilities that Make this Solution Stand Out
- It allows you to export data in bulk to migrate to Gmail, Thunderbird Outlook and many more platforms.
- Offers Dual options to load Apple Mail files separately as well as in Folders for easy and bulk process.
- Stand-alone solution to Solve how to block an email address on Apple Mail while preserving every email along with the attachments.
- Helps to make a safe and secure backup of all the important emails and data for future uses.
- Offers advanced filter options to export selective emails and data that are really important to you.
- Maintains the integrity and originality of the entire data, helps you to access all the data with exact same formatting.
Need Help Further?
Tired of using manual methods on different Apple devices and still wondering how to block an email address on Apple Mail with safety? Use the recommended professional solution. It offers multiple advanced features and quick steps to make a backup of your data, export data if you are willing to switch to another email client or account to get rid of these promotional and phishing email senders. Additionally, our Technical Support Team is always available to guide you and help you with the entire process, feel free to reach out. To them.