How to Easily Fix “VirtualBox Machine Failed to Boot” Error

Published: January 15th, 2026 • 9 Min Read
Picture this scenario: You have been working on a significant project stored on a legacy Windows operating System or on a Virtual Machine (also known as a “Guest OS”) installed on a server running the Linux OS. You go to start your project by clicking on the large green button with the white arrow pointing upwards found in the interface of Oracle VM VirtualBox. You expect to be able to jump right into your work, but are greeted instead by an impersonal error message stating “VirtualBox machine failed to boot”.
Your display may go completely dark or a popup message may appear on the screen displaying an error code such as NS_ERROR_FAILURE or E_FAIL (0x80004005). You feel horribly frustrated because all of your work is potentially lost, your Virtual Disk might be corrupted, and it is possible that a Windows Update created your problem.
Breathe deeply! You are not alone. This problem is common among Developer’s, System Administrators or SysAdmins, and Technology Enthusiast’s (commonly referred to as “Techies”) all over the world, regardless of where they happen to be. In this article, we will examine some of the most common reasons for these types of errors and will provide a simple, clear, step-by-step approach for restoring your Virtual Machine and recovering from this error.
What Does “VirtualBox Machine Failed to Boot” Mean?
In simple terms, VirtualBox is trying to “handshake” with your computer’s hardware to create space for your guest OS. When the boot fails, it signifies that handshake was rejected.
Consider it analogous to trying to jump-start a vehicle. The battery happens to be fully charged (meaning you have installed VirtualBox), your engine works perfectly (i.e. your guest operating system). However, if your ignition switch fails (i.e. improper settings or permissions), you won’t go anywhere in your vehicle.
In this scenario, VirtualBox is giving you an error because it cannot “spark ignition” during the startup process of your virtual machine.
The Usual Suspects: Why Your VM Won’t Start
Before we jump into the “how-to,” we need to understand the “why.” Pinpointing the cause saves you hours of aimless clicking. Here are the most frequent culprits:
- The Hyper-V Conflict: This is the #1 reason for Windows users. Windows 10 and 11 love their own hypervisor (Hyper-V), but it doesn’t always like sharing the sandbox with VirtualBox.
- Disabled Virtualization: If VT-x (Intel) or AMD-V (AMD) is disabled in your system’s BIOS/UEFI, the VM simply cannot “jump” into 64-bit mode.
- Saved State Corruption: Sometimes, closing a VM by “Saving the state” creates a glitchy snapshot that prevents a fresh boot.
- Graphics Controller Mismatch: Newer versions of VirtualBox changed the default graphics drivers (VMSVGA vs VBoxVGA), which can cause boot hangs.
- Insufficient Resources: Trying to give a VM 8GB of RAM when your host only has 4GB available is a recipe for an immediate crash.
The “Quick Win” Checklist (Try These First!)
Before getting into the hardcore technical steps of remediation, we advise you to try these easier solutions or “low hanging fruit.” Most often, the easiest possible solution is the one that we tend to overlook.
- Run as Administrator: Clicking on the VirtualBox shortcut and choosing the “Run as Administrator” option gives a higher-level access to the hypervisor, allowing it to access the kernel driver sections that are needed.
- Update VirtualBox: Be sure to check for updates and always download and install the latest version of the VirtualBox build. It is released by Oracle in the form of patches to ensure compatibility with the latest updates of host OS.
- Check Disk Space: If your host hard drive is nearly full (less than 1%), VirtualBox may not be able to write temporary logs and swap files to the disk before it begins to boot up.
- The “Reboot” Ritual: Though a cliché, rebooting host is the best way to clear the background processes that may cause occurrences of an Extended Exit or Error.
Step-by-Step Manual Fixes to Resolve Boot Errors
If the checklist didn’t work, it’s time to get under the hood. Follow these steps in order.
1. Disabling Hyper-V (The Windows 11 Fix)
Windows includes a feature called the “Windows Hypervisor Platform.” While useful for WSL2, it often blocks VirtualBox from accessing the hardware directly.
- Open the Control Panel > Programs > Turn Windows features on or off.
- Find Hyper-V and uncheck it.
- Also, uncheck Virtual Machine Platform and Windows Hypervisor Platform.
- Restart your PC.
2. Enabling VT-x / AMD-V in BIOS
If your VM says “VT-x is not available” you need to fix this at the hardware level.
- Restart your computer and tap F2, F10, or Del to enter the BIOS/UEFI.
- Look for Advanced CPU Configuration or Security.
- Enable Intel Virtualization Technology or SVM Mode.
- Save and exit.
3. Change the Graphics Controller
If your VM starts but hangs at a black screen with a blinking cursor, the graphics settings are likely to blame.
- Select your VM in the list and click Settings.
- Go to Display > Screen.
- Change the Graphics Controller to VMSVGA (for Linux) or VBoxSVGA (for Windows).
- Uncheck “Enable 3D Acceleration” temporarily to see if it boots.
4. Discard the “Saved State”
Is your VM stuck in a “Paused” or “Saved” state? That saved file might be corrupted.
- Right-click the VM in the VirtualBox Manager.
- Select Discard Saved State (or press Ctrl+J).
- This is like a hard reset. You will lose unsaved work in the VM, but it often fixes the boot loop.
The Limitations of Manual Fixes: When Things Get Risky
There are limits to the troubleshooting steps outlined above, even though they address approximately 80% of the problems encountered while troubleshooting a virtual machine. Following are some of the likely risks & challenges of performing manual troubleshooting:
- Risk of Data Overwrite: When repeatedly changing settings and performing hard resets on your virtual machine, you potentially risk corrupting your file system in the VDI (Virtual Disk Image).
- Complexity: For inexperienced users, making changes in the BIOS settings and registry may seem complicated and, in some cases, can be dangerous for the host operating system.
- Time-Consuming: You could spend an entire weekend in forums only to eventually find out that your virtual disk header is corrupted.
- No Guarantee: If the underlying .vdi or .vmdk file is actually damaged, implementing all of the above options will still not automatically cause it to boot.
What to Do When the Manual Fixes Fail?
If you have tried everything and that “VirtualBox machine failed to boot” error is still persisting, the problem likely isn’t the settings—it’s the virtual disk itself.
When the VDI/VHD/VMDK file becomes corrupted due to a sudden power outage or a host crash, VirtualBox simply cannot read the boot sector. This is the “point of no return” for manual fixes.
The Professional Solution: BitRecover Tool
When your data is too important to lose, you need a dedicated tool that can “look inside” the virtual disk without needing VirtualBox to actually run. BitRecover VDI Recovery Software is designed specifically for this scenario.
It acts as a digital bridge, allowing you to extract your files, photos, databases, and documents directly from the failed VM file. You don’t need to fix the boot error; you just need to get your data out.
- No Hypervisor Needed: Recovers data from .vdi, .vhd, .vmdk, and .avhd files without opening VirtualBox.
- Handles Corruption: Even if the VM says “disk not found,” BitRecover scans the raw sectors to find your files.
- User-Friendly: Designed with a simple interface that even a novice can navigate.
- USA & Global Support: Trusted by IT professionals across the United States for critical data recovery tasks.
Don’t risk your data by trying increasingly “hacky” fixes. If the boot fails, focus on recovery first.
Simple Recovery Steps Using BitRecover Software
- Open the tool on your host machine.

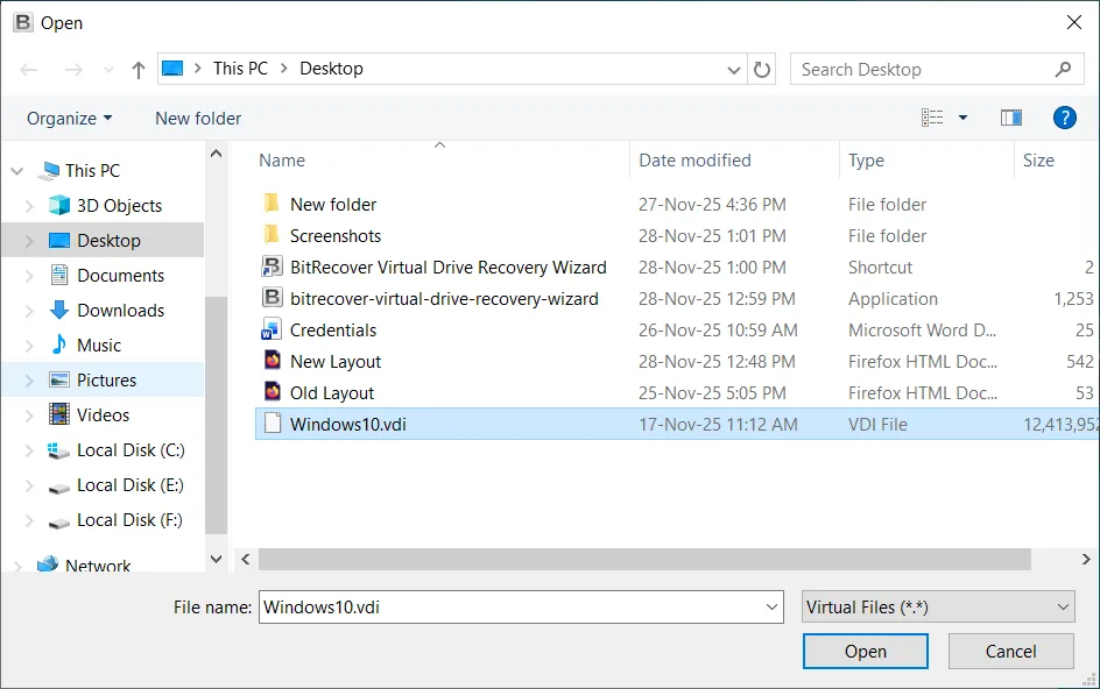
- Select the virtual disk file (VDI, VMDK, VHD) that VirtualBox can’t boot from.

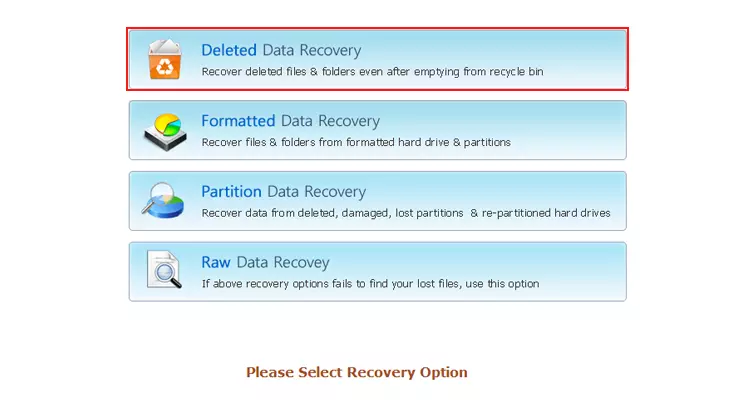
- Choose the Appropriate Recovery option for recovering data from the virtual disk file.

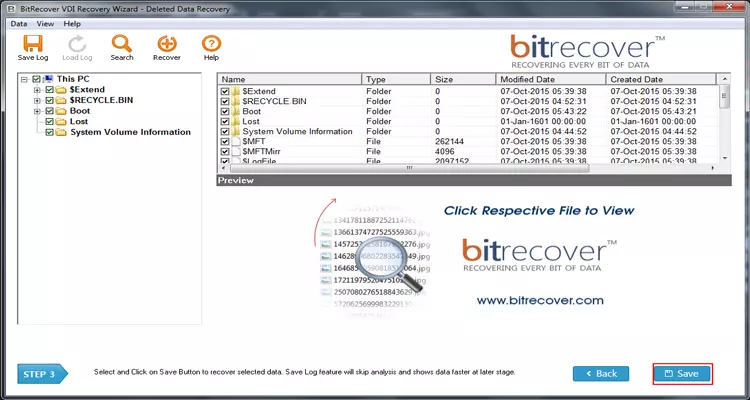
- Select & Scan the Drive Partition and wait while the software finds recoverable files.

- Preview results and choose the files or folders you want to save.

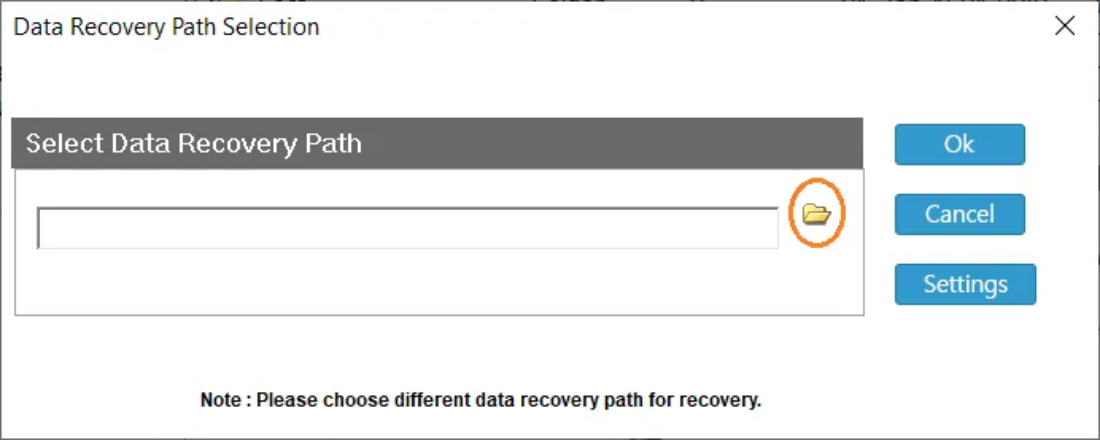
- Save recovered data to a new folder on your host.


Frequently Asked Questions (FAQ)
Q: What happens to my other applications if I stop using Hyper-V?
A: Your WSL2 or Docker applications might be affected. If you need access to both, install VirtualBox 7.x, which provides better support for co-existence. However, if you want to fix boot errors; the most dependable way is to disable Hyper-V.
Q: What does the error code “E_FAIL (0x80004005)” mean?
A: This code indicates an error related to permissions or that VirtualBox cannot access the VirtualBox driver on your host system. Reinstalling VirtualBox as an Administrator will usually solve this error.
Q: Is it possible to recover data from a Linux virtual machine on Windows?
A: Yes! You can recover any type of data from inside the virtual disk when using BitRecover, even if you are running a different operating system as your host.
Q: My screen has gone Black. Does it mean I am going to lose all my data?
A: Not at all; when you see a black screen, it generally means that the bootloader has become confused or the display driver is not compatible. Your files are still safe inside your VirtualBox virtual drive.
Final Thoughts:
Dealing with a VirtualBox machine failed to boot error is a rite of passage for anyone working with virtualization. In most cases, it’s just a conflict between Windows features or a simple BIOS toggle. However, when the “technical gremlins” get deep into your virtual hard drive, knowing when to stop manual troubleshooting is key to saving your data.
Try the manual fixes we outlined: check your BIOS, disable Hyper-V, and tweak your display settings. But if the VM stays dark, remember that tools like BitRecover are there to ensure that a failed boot doesn’t turn into a permanent data loss disaster.
Ready to get your files back? Check out the BitRecover software and see how easy it is to browse your VM files even when the machine won’t start!