How to Import MBOX to Dovecot Open-Source Server?

Overview: Nowadays several professionals prefer to import MBOX to Dovecot Server (IMAP and POP). Users export MBOX files from various email programs and set up Dovecot Server for emails. After that, they prefer to import MBOX files to Dovecot to manage all mailboxes on one platform.
What Are MBOX File and Dovecot Server?
MBOX is a generic file format to store email messages in *.mbox extension. Several email clients and web-based email services allow to export of emails in MBOX import MBOX to Dovecot. Even various email programs store email folders in MBOX format i.e. Inbox.mbox, Sent.mbox, etc.
Dovecot is an open-source email server and backend program so multiple organizations and enterprises prefer to use it. This is an open-source program to implement IMAP and POP3 Servers for businesses so users can customize Dovecot according to their work requirements.
Why Import MBOX to Dovecot Server?
- Centralized Email Management: Several users want centralized email management, so they export emails from MBOX to Dovecot Server. Thereafter, they can consolidate all emails in one place.
- Enhanced Accessibility: Dovecot Server is an IMAP-compatible server so users can set up their email accounts with various email clients. After that, they can access Dovecot emails remotely from anywhere at any time.
- Best In Class Security: The Dovecot email backend program offers robust security features so respective users transfer MBOX files to Dovecot Server. Dovecot provides secure authentication, SSL/TLS encryption, and spam protection features.
- Access Old Mailboxes: Sometimes users want to restore old emails in Dovecot Server stored in MBOX format. This task can be completed when users import MBOX to Dovecot.
Get It Now: Reliable Tool to Compress MBOX Files
Manual Approach to Move MBOX Files Into Dovecot Server?
To import MBOX files into Dovecot mail server, there are several methods that can be used to achieve it. To import MBOX files into Dovecot, there are several methods that can be used to achieve it. In this section all the methods have thier own capability, process and case use but they all are aimed to help you import MBOX data into Dovecot servers.
Import MBOX to Dovecot Server Using Commands
- Before starting the importation, check your system and its environment for the importation:
- Upload through Dovecot Adm
- Set up and prepare your environment for importation
- Access the mail server using SSH access,
- install and verify dovecot
- Locate mail storage path
- Verify mail user
- Set correct permissions like ownership and reliability access
- Check IMAP and POP3 access
- Then, install and verify the Dovecot utility
- Now, verify that the MBOX file is on the server
- Then, locate the Dovecot email address where you want to import the files in.
- Now, run Dovecot adm. This specific code is needed: doveadm import -u :
Lastly, Login in to your Dovecot email client and verify that all the mails are imported or not.
Importation of MBOX File Into Dovecot Using local directory
This method includes importing mbox files directly into the Dovecot local directory. Follow the steps to understand a clear approach and successful importation of dovecot mail server:
- Locate the dovecot directory on the server by using dovecot.conf setting.
command: grep “mail_location” /etc/dovecot/dovecot.conf - Put a hold on all service Dovecot, as it may cause conflicts using the importation process.
command: sudo cp /home/admin/backup/inbox.mbox /var/mail/username - Copy the MBOX data file and place it in the targeted location.
command: sudo cp /home/admin/backup/inbox.mbox /var/mail/username. - Allow correct permission and ownership to the file
command: sudo chown username: mail /var/mail/username
sudo chmod 600 /var/mail/username - Restart the Dovecot service that was paused earlier.
- Use this command to rescan and index the MBOX file imported.
command: doveadm index -u [email protected] INBOX
Drawbacks of The Manual Method
- Existing data deletion: During the process of importation, their a higher chance of deletion of existing data either by glitches or any human errors.
- No Bulk capability support: These methods are not suited for bulk transfer, as repetition of the process multiple times will be required, and also handling bulk data can also cause issues due to human errors. Handling multiple email profiles is very difficult
- Downtime required: During the process, the dovecot needs to be paused, during which time emails will not be received. This can cause ignorance of important messages.
- Time-consuming: importing data into Dovecot can be a time-consuming and effort-intensive process, causing frustration and uncertainty about working the method efficiently.
Advanced Tool to Transfer Emails from MBOX to Dovecot Server
BitRecover MBOX Converter Software is the best-recommended solution to migrate MBOX to Dovecot Server. Dovecot supports Maildir files, and this utility has a separate option to convert MBOX to Maildir files.
This MBOX to Dovecot Converter comes with a free demo version that permits to migrate first 25 emails from each MBOX to Dovecot Server. Hence, first, use the trial version and check the software’s working steps.
After getting complete satisfaction, you can upgrade it anytime to import MBOX to Dovecot without any size restriction. Let’s follow the instructions to know more about its working steps.
How to Migrate MBOX to Dovecot Server?
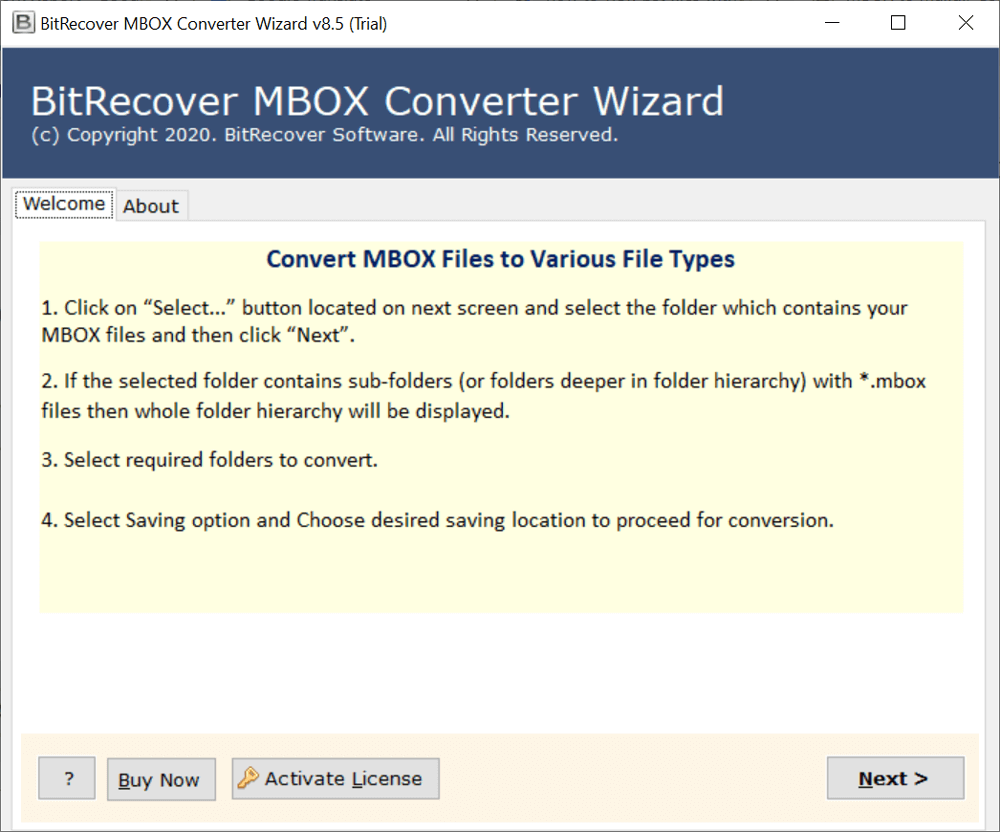
- Launch the Dovecot Import MBOX Tool and read the instructions.

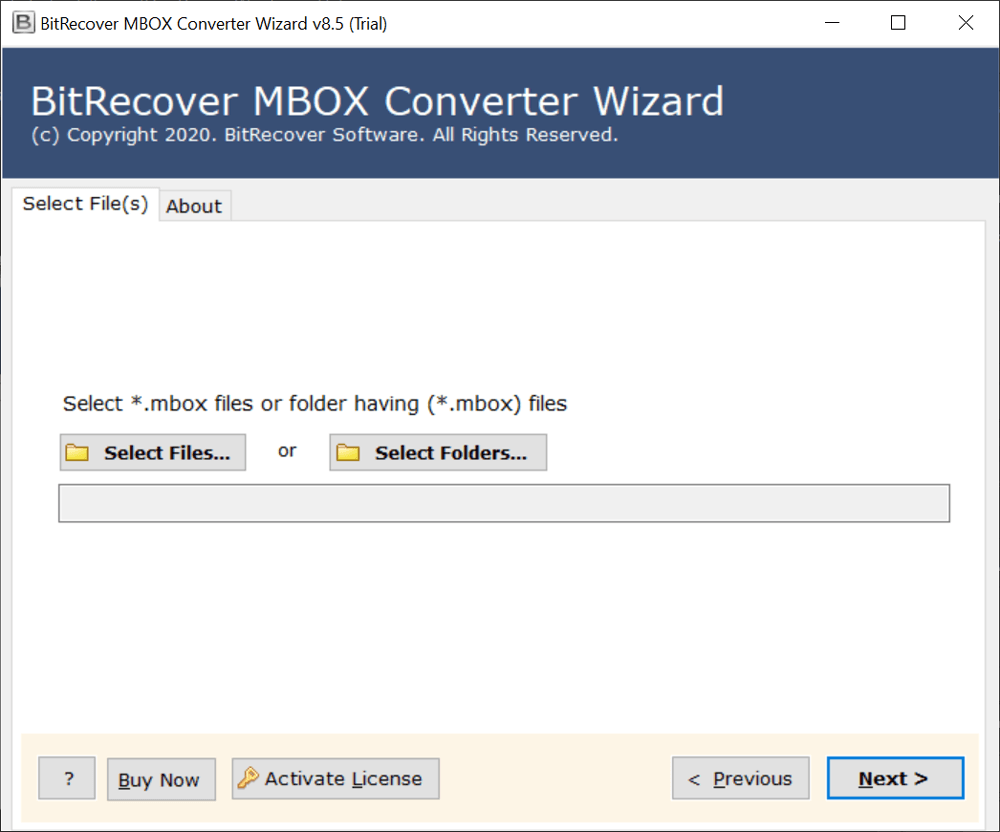
- Use Select Files or Select Folders to add MBOX files in GUI.
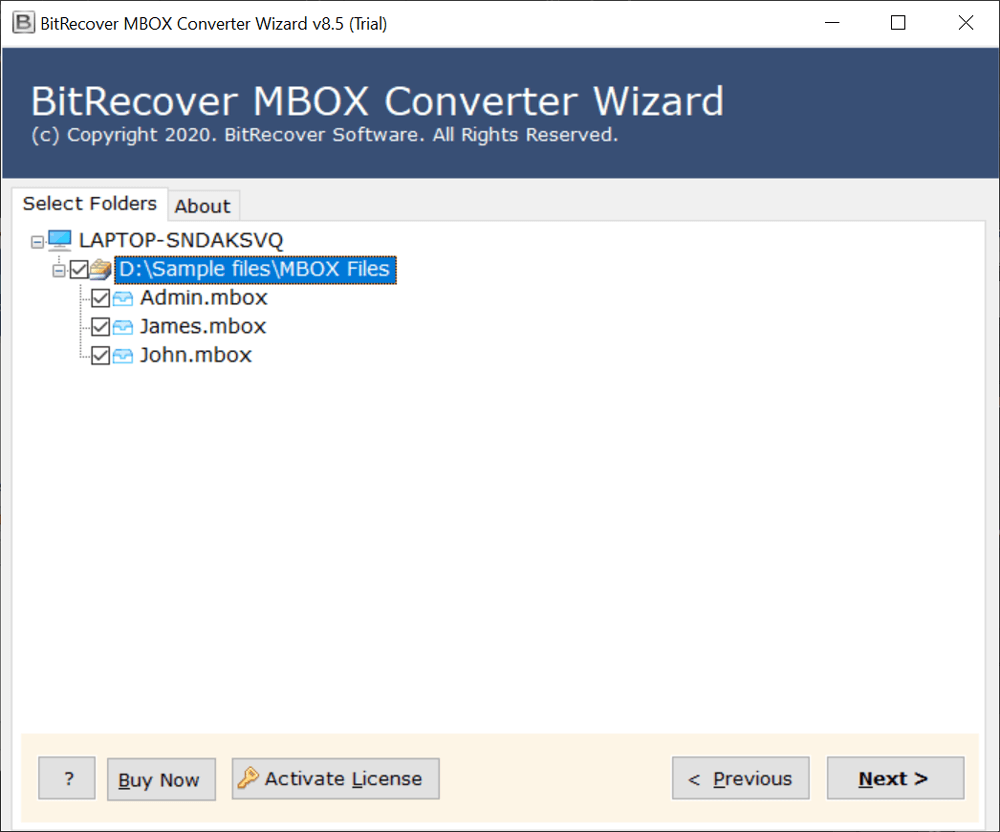
- Check the required mailbox files and choose the Next option to import MBOX to Dovecot.
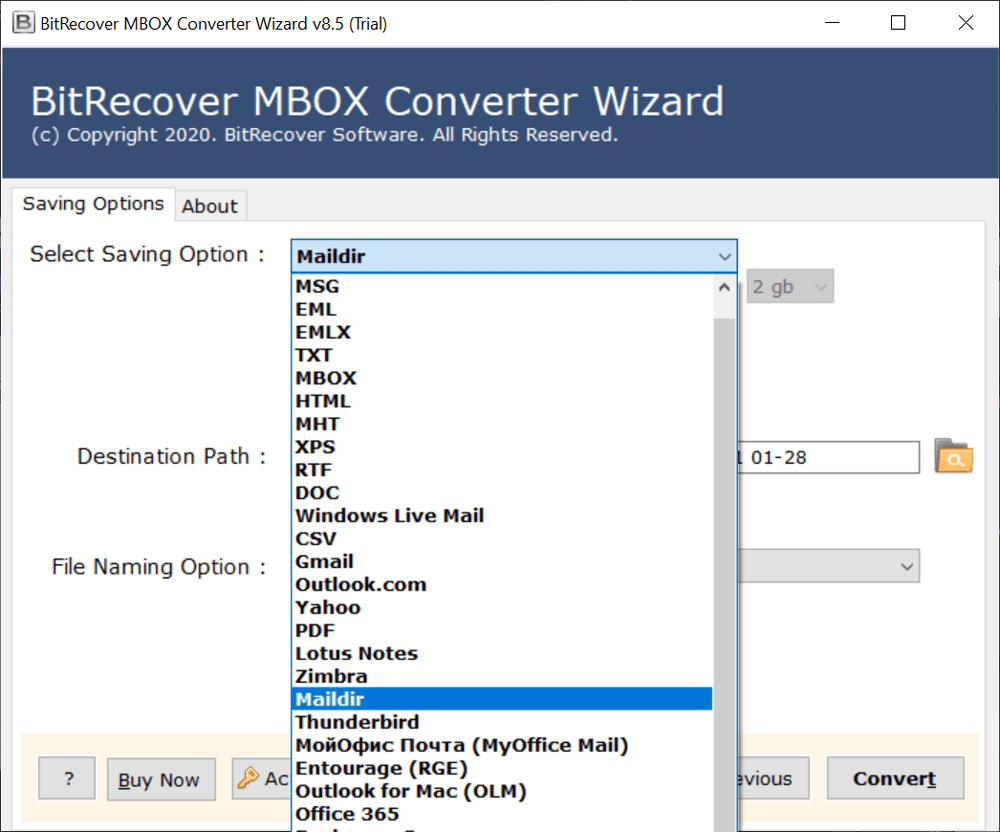
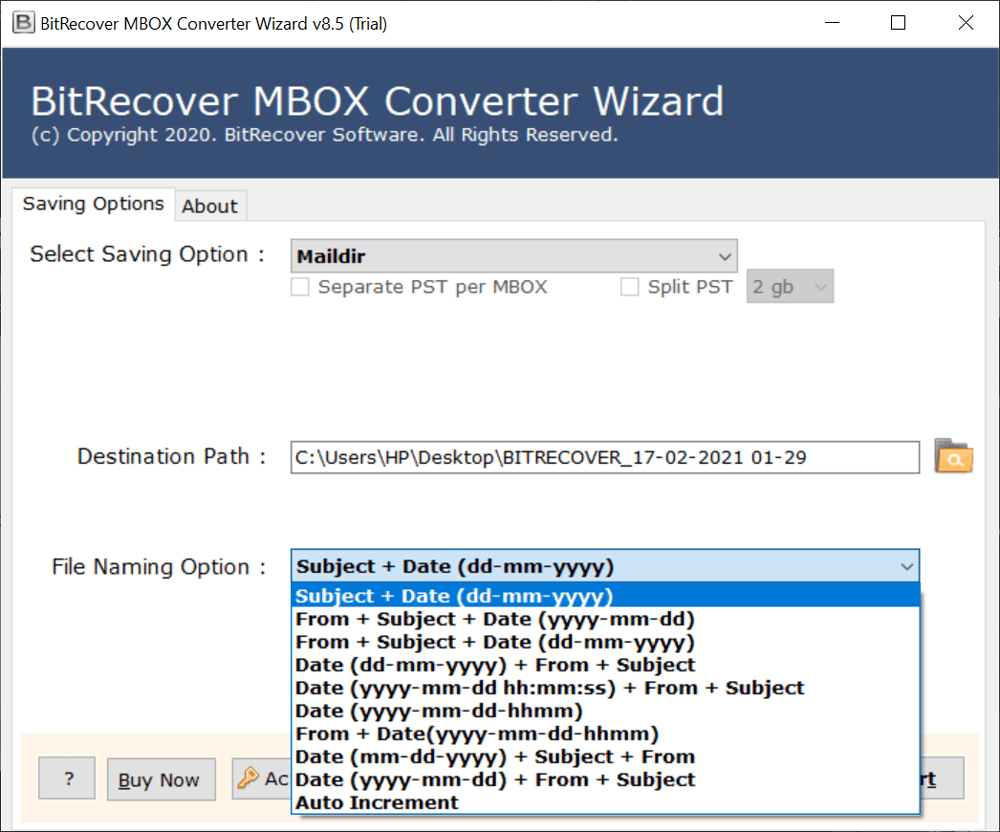
- Select Maildir as a preferred saving option as shown.
- Use file renaming options to rename resultant directories.
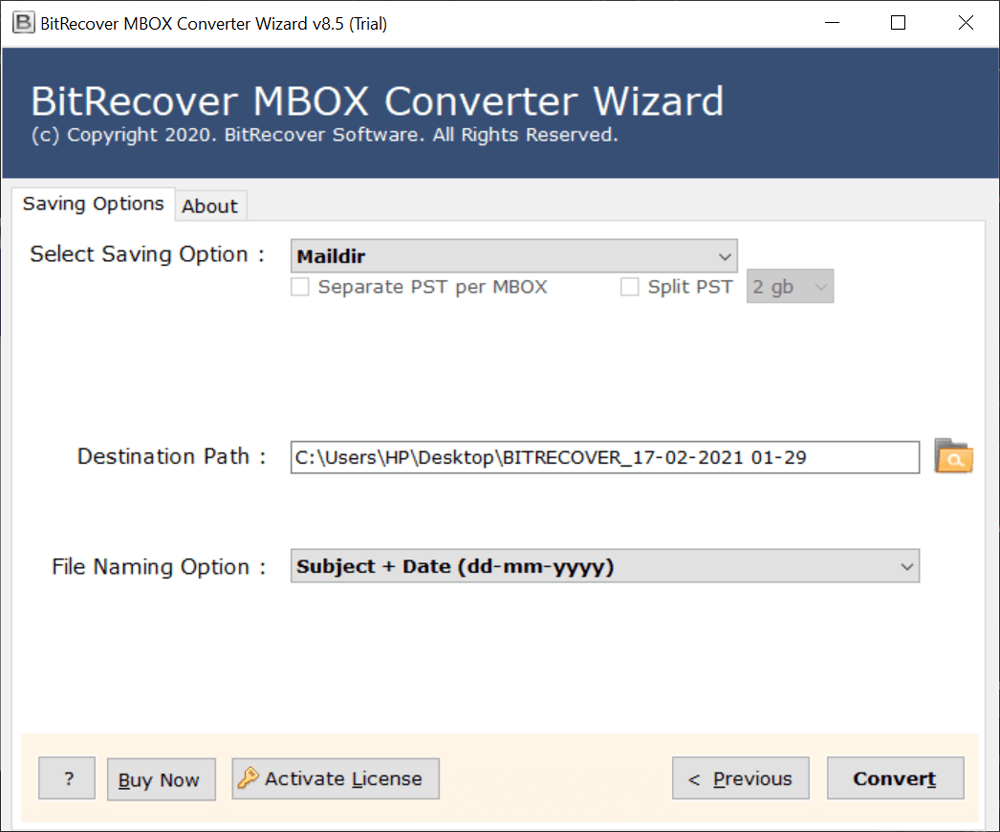
- Click the Browse icon and set a preferred destination path.
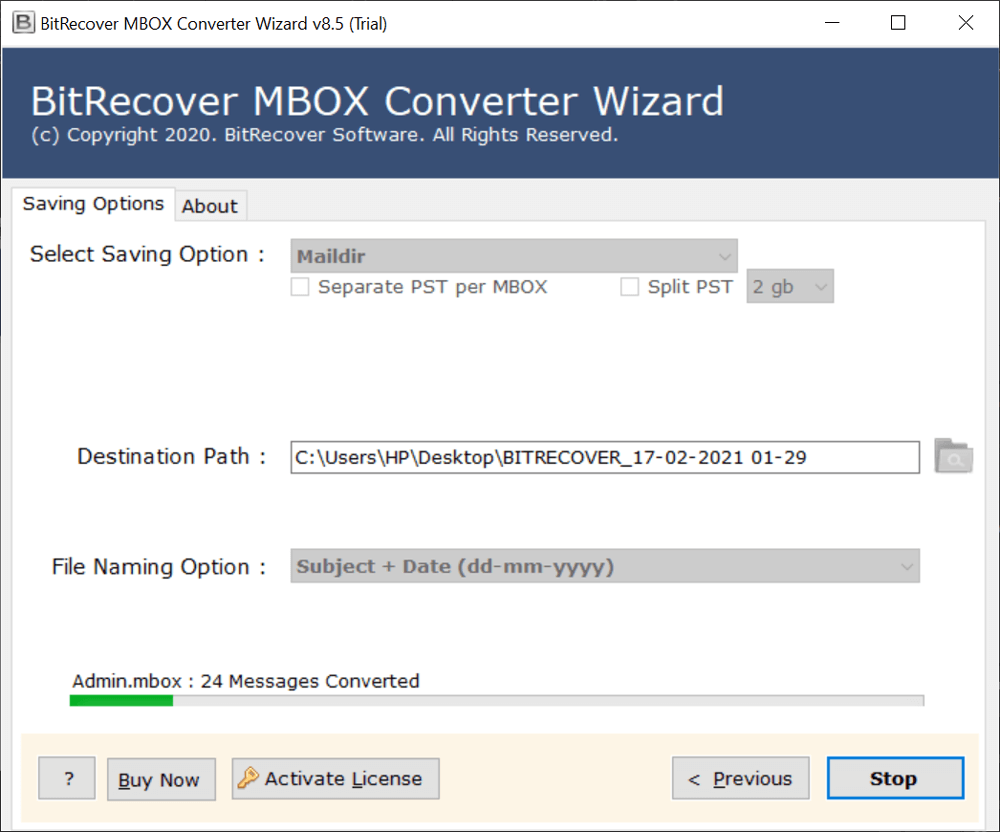
- Press the Convert button to convert MBOX to Dovecot Maildir.
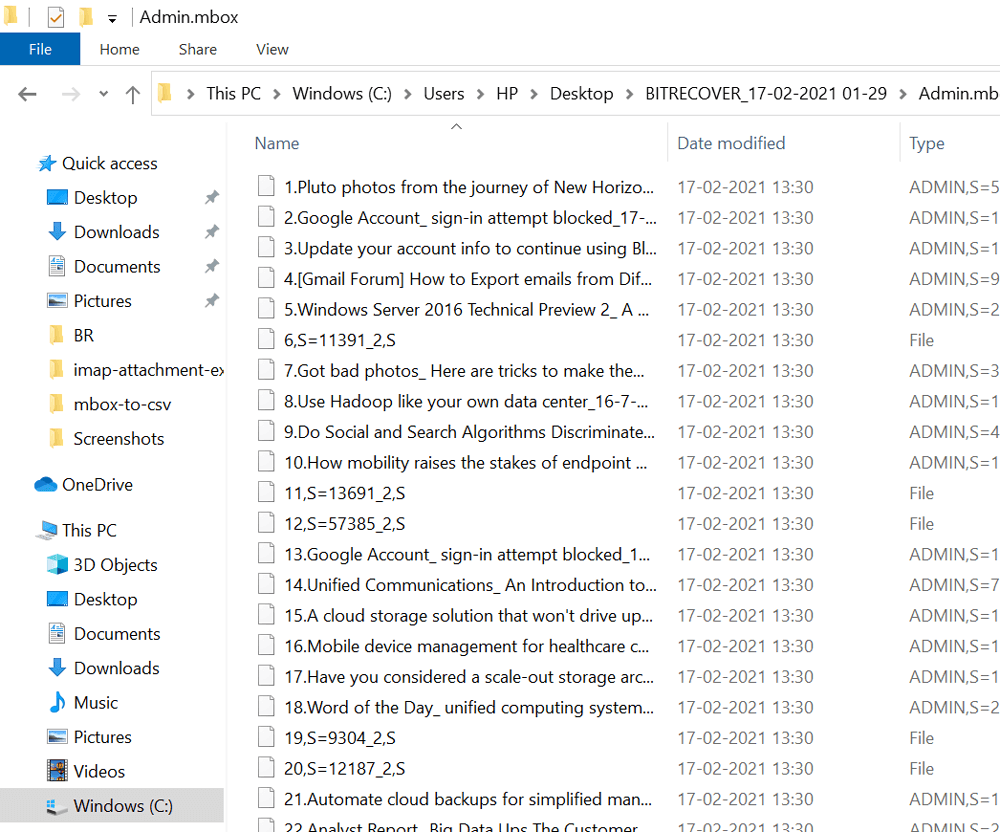
- After completion, get the resultant files from a selected path.
Note That: After getting resultant files in Maildir format. Server administrators can easily import them into Dovecot Server using “cp” [Copy] and “mv” [Move] commands as mentioned below:
cp -R /path/to/old/Maildir/* /home/user/Maildir/
mv /path/to/old/Maildir/* /home/user/Maildir/
MBOX to Dovecot Converter Highlight Features
- The tool is suitable to import MBOX to Dovecot in bulk at once. Hence, you can complete this task by involving very little effort.
- This software supports MBOX files of Thunderbird, Apple Mail, SeaMonkey, Google Takeout, Eudora, Opera Mail, etc.
- It offers several file naming convention options so our respective clients can manage resultant files in different styles.
- MBOX to Dovecot Converter maintains complete email items, attributes, components, properties, folder, and sub-folder structure.
- This utility offers several advanced filter options to migrate MBOX to Dovecot Open-Source Server between a specific date range, subject, and user.
Questions You Might Have
Q 1: How to migrate MBOX to Dovecot Server?
Dovecot Import MBOX Tool is an excellent, reliable, and trustworthy solution to migrate MBOX to Dovecot Server.
Q 2: Can I download and install MBOX to Dovecot Converter on Windows 11 Machine?
Yes, our software supports all Windows and Mac OS versions. You can use it on your Windows 11 computer.
Q 3: Is your software compatible with Thunderbird MBOX files?
Yes, this software is well-suitable with MBOX files of Thunderbird, Apple Mail, Google Takeout, Eudora, etc.
Conclusion
Above we have discussed a professional way to import MBOX to Dovecot Server together with all associated items. This software comes with a free trial edition so first use it to get complete satisfaction. After that grasp the license keys to activate it. If you have any questions about the process, then connect with our technical support team.
Recommended: Software to Remove Duplicate Emails in MBOX
