How to Fix “VDI Invalid Header” Error in VirtualBox

Published: January 21st, 2026 • 5 Min Read
Imagine this: You’re right in the middle of a project, you go to launch your Virtual Machine, and instead of your desktop loading up, you’re greeted by a cold, gray error box. It says “VD: error VERR_VD_VDI_INVALID_HEADER.”
Disastrous! All your files, configurations, and hard work are locked inside that VDI file. To make matters worse, you might also see a message saying the system failed to acquire the virtualbox com objects. Digitally it feels like you’ve lost the keys to your own house.
But don’t panic! Whether you are a seasoned system’s administrator or a student who’s still learning, this error does not mean that your critical data is lost forever. In this guide, we’re going to break down exactly why this happens and how you can fix it yourself through easy-to-implement manual steps as well as professional BitRecover software.
What Exactly is the “VDI Invalid Header” Error?
In simple terms, think of your VDI file like a book. The “Header” is the table of contents. It tells VirtualBox how many pages there are, where the chapters start, and how to read the information. If that table of contents gets smudged or torn (corrupted), VirtualBox gets confused and simply gives up.
When this happens, VirtualBox often struggles to communicate with its own internal systems, which is why you might see the “failed to acquire the virtualbox com objects” error pop up shortly after. It’s essentially a communication breakdown between the software and your virtual hard drive.
Why Did This Happen to My VM? – Common Reasons.
- Sudden Power Cuts: If your PC shut down while the VM was still “writing” data, the header might have been left incomplete.
- Storage Glitches: Bad sectors on your physical hard drive or SSD can corrupt that tiny, vital piece of the VDI file.
- Improper Exit: Force-closing VirtualBox instead of shutting down the guest OS properly is a common culprit.
How to Fix “VDI Invalid Header” Error: 3 Easy Manual Methods
Method 1: Release and Re-attach the Virtual Disk
Sometimes, VirtualBox just needs a “refresh” to recognize the file header again. This is the simplest fix and works more often than you’d think.
- Open VirtualBox Manager.
- Go to File > Virtual Media Manager.
- Locate the VDI file that is causing the trouble.
- Click Release and then Remove (don’t worry, choose “Keep Files” so the actual disk isn’t deleted).
- Restart VirtualBox and try adding the VDI back through the VM Settings.
Method 2: Use the VBoxManage Command (The “Pro” Way)
VirtualBox comes with a built-in “repairman” tool called VBoxManage. We can use it to try and clone the corrupted VDI into a fresh, healthy one.
- Open the Command Prompt (CMD) as an Administrator on your Windows PC.
- Navigate to your VirtualBox folder (usually
C:\Program Files\Oracle\VirtualBox). - Type the following command:
VBoxManage clonehd "path-to-corrupted-file.vdi" "path-to-new-file.vdi" - If the header isn’t too badly damaged, VirtualBox will generate a new, functional disk for you.
Method 3: Check for Registry/COM Object Issues
If you are still seeing the failed to acquire the virtualbox com objects error, the issue might be with how VirtualBox is registered on your Windows system. Try this:
- Press Win + R, type
regsvr32 VBoxC.dll, and hit Enter. - This re-registers the core components and often clears up those pesky communication errors.
The “No-Stress” Way: Retrieve Data from a Corrupt VDI
Let’s be real: manual fixes don’t always work, especially if the header damage is severe. If you’ve tried the steps above and your VM still won’t boot, you might be worried about losing your data forever.
This is where BitRecover Virtual Drive Recovery Wizard comes to the rescue. Instead of trying to “fix” the broken header, our tool dives deep into the VDI file, scans and extracts data i.e. your folders and files directly. It’s like having a digital locksmith who can open the door even if the lock is smashed.
Why use BitRecover?
- It recovers data from VDIs even if VirtualBox says they are “Invalid” or “Corrupt.”
- No technical skills are required—just select the file and click ‘Scan.’
- It supports all Windows versions and various file systems (NTFS, FAT32, etc.).
Simple Recovery Steps Using BitRecover Software
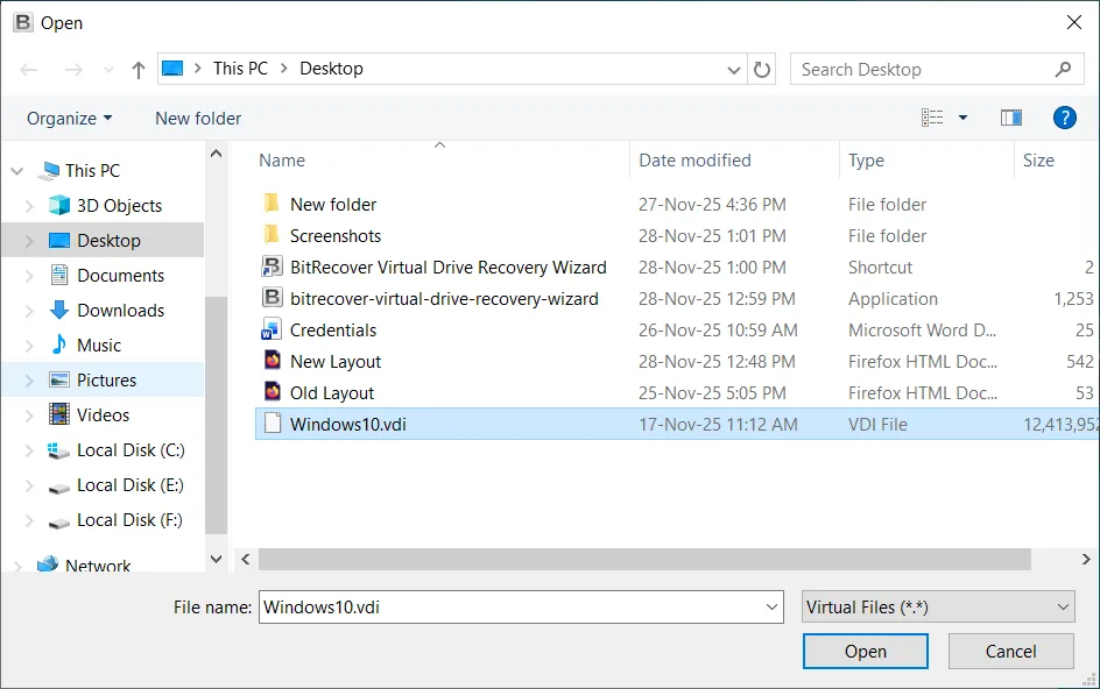
- Open the tool on your host machine.

- Select the VirtualBox VDI file.

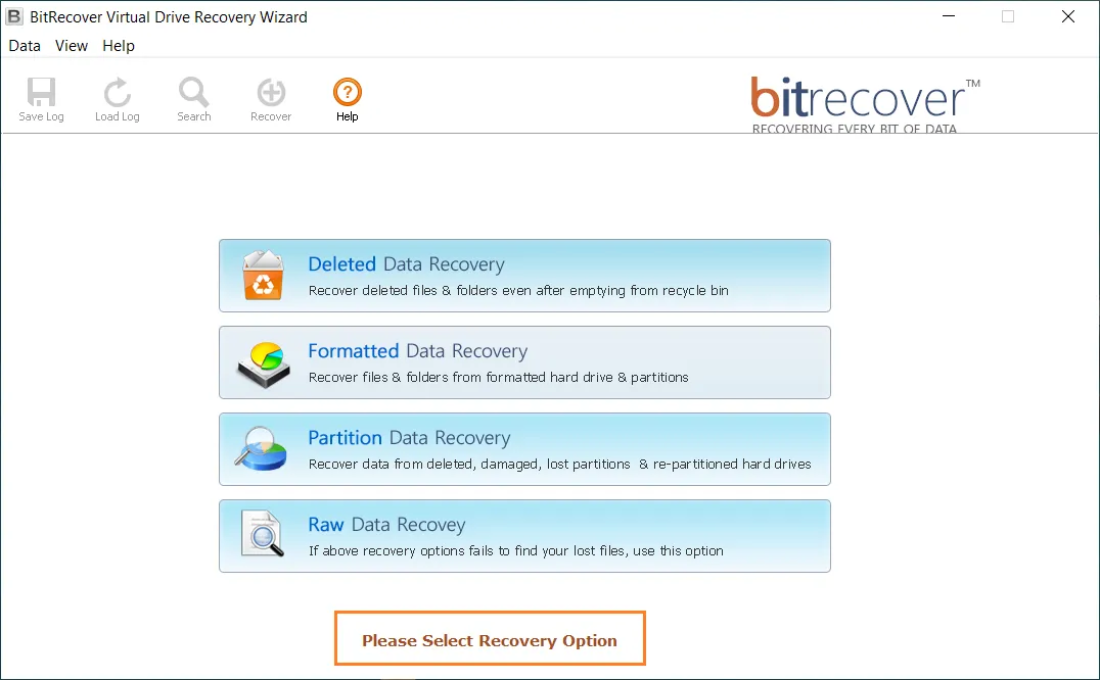
- Choose the Appropriate Recovery option for recovering data from the virtual disk file.

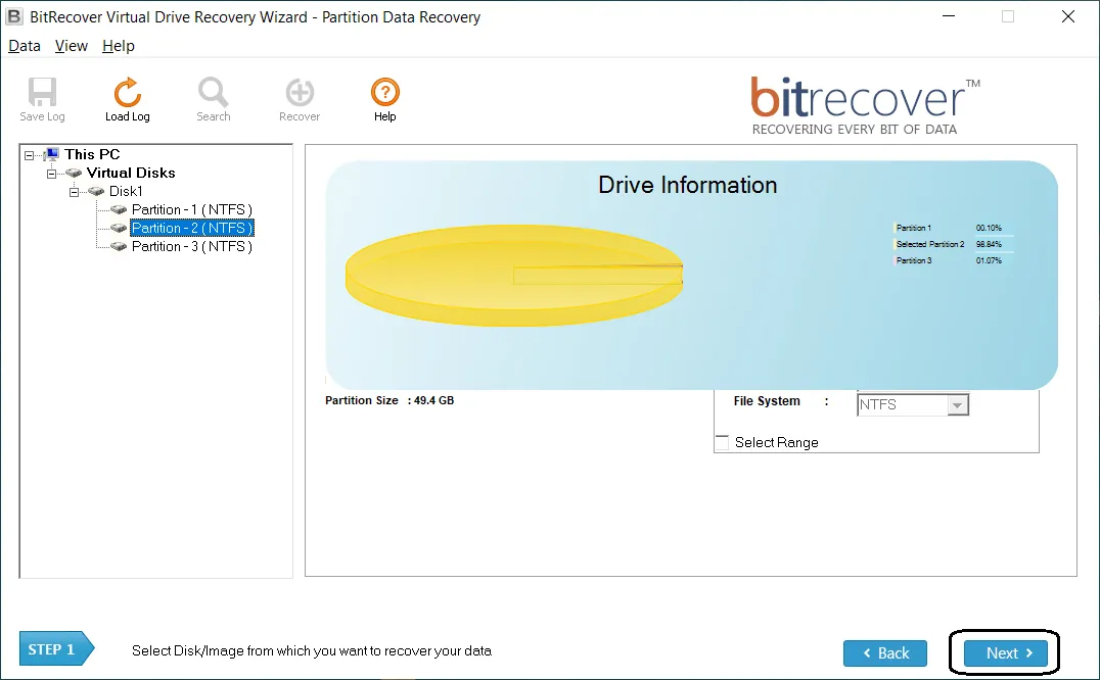
- Select & Scan the Drive Partition and wait while the software finds recoverable files.

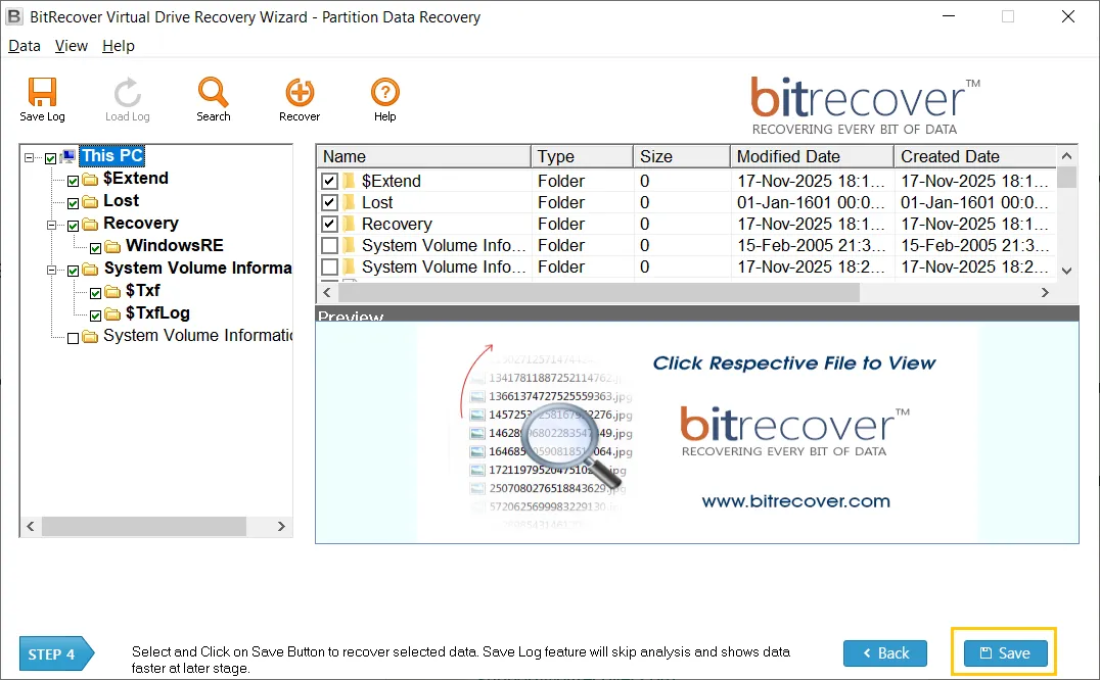
- Preview results and choose the files or folders you want to save.
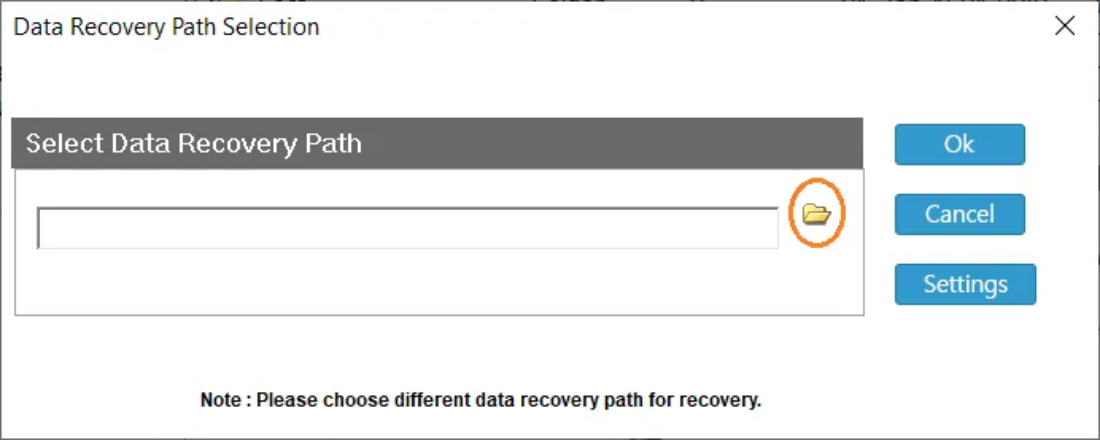
- Save recovered data to a new folder on your host.

Wrapping Up
The VDI invalid header error is frustrating, but it surely does not mean end of the road. By trying the VBoxManage clone solution trick or re-registering your COM objects, you can often get back to work in minutes. And for those times when the damage is just too much, BitRecover is here to ensure that your important data stays with you and never gets lost.
Did this guide help you? If you’re still seeing the failed to acquire the virtualbox com objects message after trying these steps, reach out to our support team—we’re always happy to help!