How to Fix “Hyper V Component is Not Running” Error

Published: January 15th, 2026 • 4 Min Read
What This Error Means
The message usually appears when Hyper‑V services or the hypervisor are not active on your host system. That can happen after Windows updates, conflicting virtualization software, or disabled services. When the hypervisor isn’t running, VMs can’t start. You may also see related errors like failed to acquire the virtualbox com objects if multiple hypervisors conflict.
What Causes “Hyper V Component is Not Running” Error
- CPU virtualization disabled in BIOS or UEFI: If Intel VT‑x or AMD‑V is turned off at the firmware level, the Windows hypervisor cannot start and VMs will fail with this error.
- Hyper‑V services not running or misconfigured: Key services such as Hyper‑V Virtual Machine Management and Hyper‑V Host Compute Service must be running and set to automatic for the hypervisor to function.
- Hypervisor launch type disabled in boot configuration: The hypervisor can be prevented from launching by boot configuration settings (for example,
bcdedit /set hypervisorlaunchtype off). - Conflicts with other virtualization platforms: Installed software like VMware Workstation, VirtualBox, or Docker (legacy configurations) can block Hyper‑V or change virtualization settings, causing the component not to run.
- Windows feature or role not fully enabled: If the Hyper‑V role or required Windows features (Hyper‑V Platform, Hyper‑V Management Tools) are partially installed or corrupted, the hypervisor may not start.
- Security features or firmware settings blocking hypervisor: Features such as Device Guard, Credential Guard, or certain Secure Boot/firmware settings can interfere with Hyper‑V initialization.
- Driver or system file issues: Corrupt or missing Hyper‑V drivers and system files can prevent the hypervisor from loading at boot.
- Windows updates or recent configuration changes: A recent update, driver change, or group policy can alter hypervisor behavior and stop Hyper‑V components from running.
Quick Checklist Before Starting Manual Fix
- Back up VM files (copy
.vhdx/.vhd/.vmdkfiles) before making changes. - Do not run risky repairs on the original disk; work on a copy.
- Decide whether to try DIY fixes or use a recovery tool if the disk is corrupted.
Step‑by‑Step Easy Manual Fixes
- Check Hyper‑V services: Open Services (
services.msc) and ensure Hyper‑V Virtual Machine Management and related services are running. - Enable the hypervisor: Run Command Prompt as admin and execute
bcdedit /set hypervisorlaunchtype auto, then reboot. - Disable conflicts: Turn off other hypervisors (VirtualBox, VMware) or Windows features like Device Guard that block Hyper‑V.
- BIOS/UEFI: Make sure virtualization (Intel VT‑x / AMD‑V) is enabled in firmware.
- Windows Features: Reinstall Hyper‑V from “Turn Windows features on or off” and reboot.
When to Use Automated Recovery Software
If the VM disk is damaged or manual fixes fail, BitRecover Virtual Drive Recovery can scan corrupted virtual disks. It can extract files safely without requiring risky hex edits. This is the safer route for important data and business users.
Simple Recovery Steps Using BitRecover Software
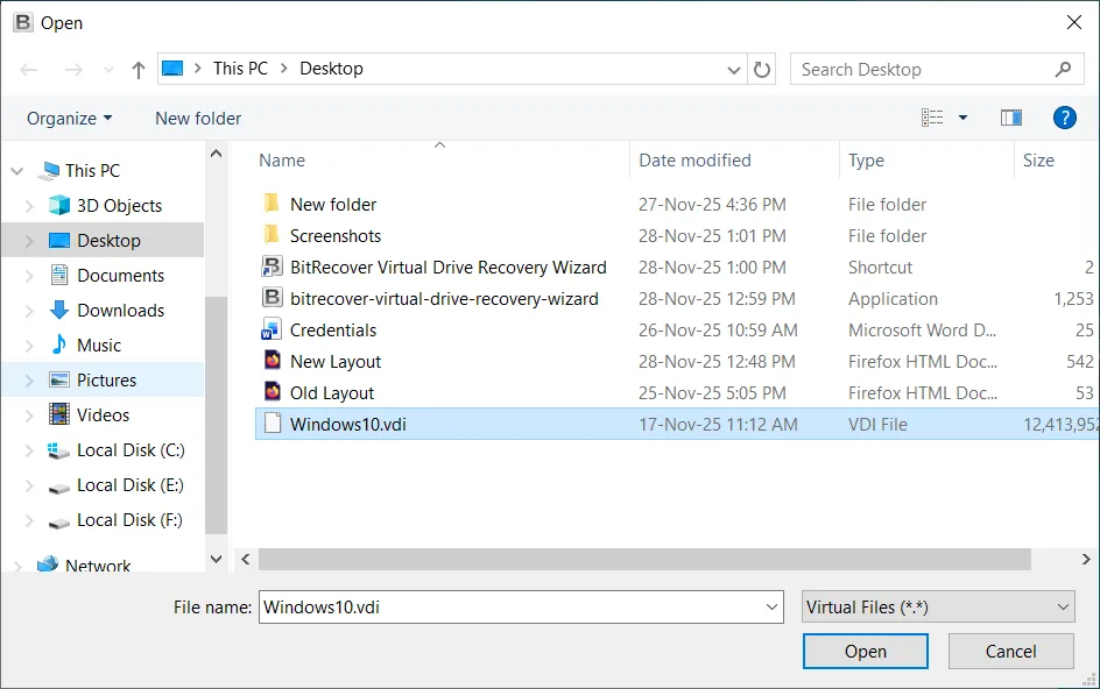
- Open the tool on your host machine.

- Select the virtual disk file (VDI, VMDK, VHD) that VirtualBox can’t boot from.

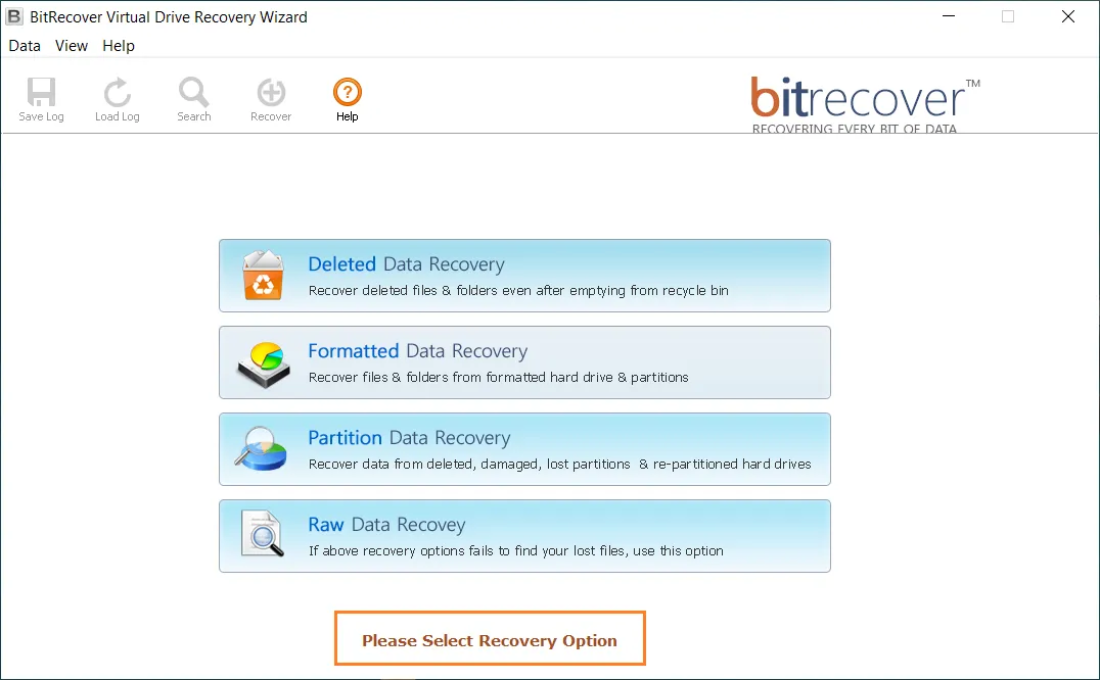
- Choose the Appropriate Recovery option for recovering data from the virtual disk file.

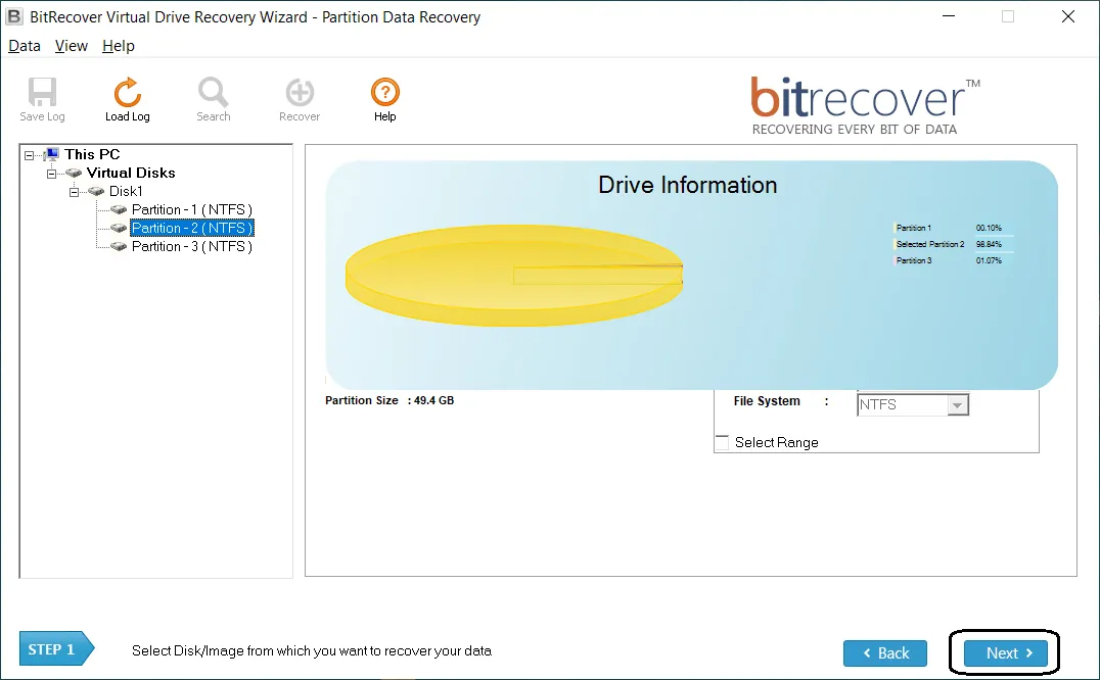
- Select & Scan the Drive Partition and wait while the software finds recoverable files.

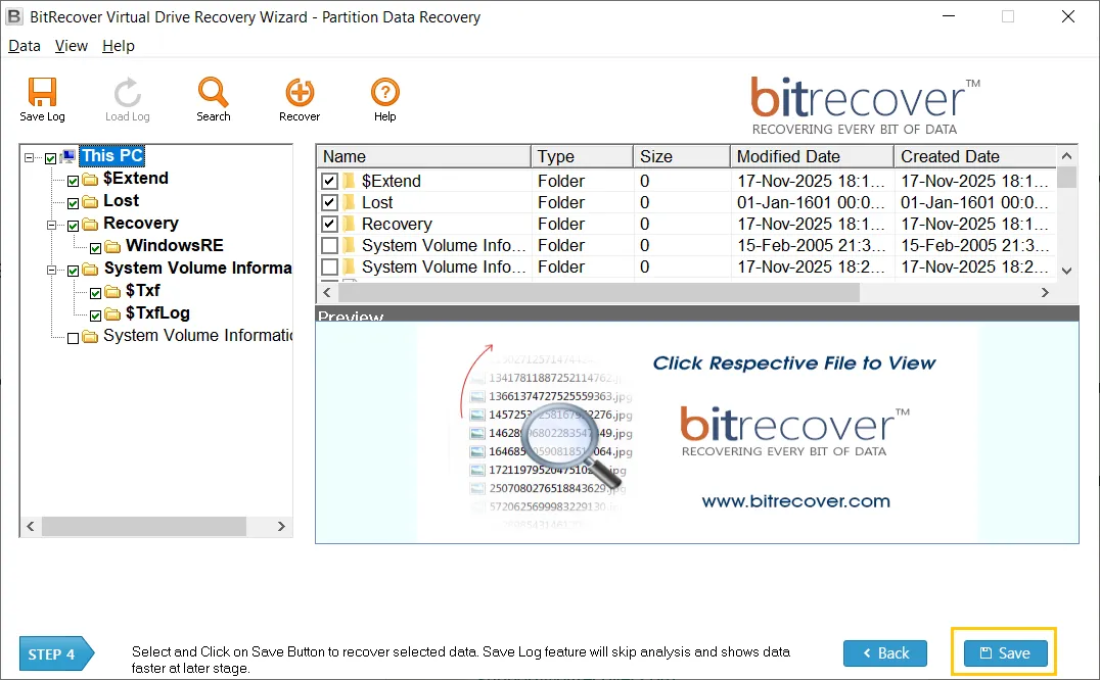
- Preview results and choose the files or folders you want to save.
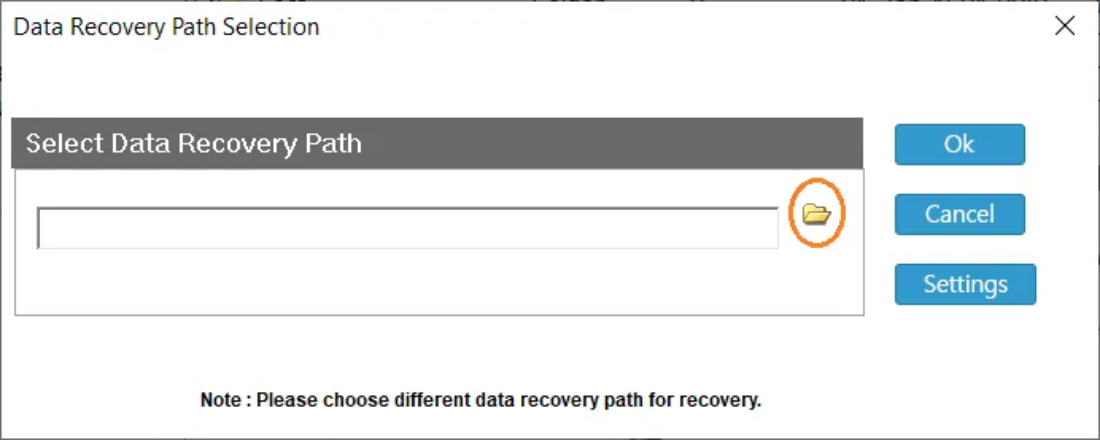
- Save recovered data to a new folder on your host.

Final Tips:
Always work on the copies of VM disks. Manual edits can make recovery harder; recovery tools cost money but are non‑destructive and often faster. If you see failed to acquire the virtualbox com object, it usually signals a hypervisor conflict. During such situations, disable the other hypervisor or follow the steps above.