How to Fix “Failed to Acquire the VirtualBox COM Object” Error

Published: January 15th, 2026 • 5 Min Read
What Exactly is the VirtualBox COM Object Error?
To understand this simply, think of VirtualBox like a television and the “COM object” as the remote control. If the remote runs out of batteries or loses its connection, the TV won’t turn on. In technical terms, the COM (Component Object Model) is the bridge that helps VirtualBox talk to your Windows operating system. When that bridge collapses, the application refuses to launch.
Why is this happening to me?
- Permission issues: Windows is being a bit too strict and won’t let VirtualBox run.
- Background hang-ups: A previous session didn’t close properly and is “clogging” the system.
- Update glitches: A recent Windows update might have changed how apps talk to each other.
Simple Fixes for “Failed to Acquire the VirtualBox COM Object”
Before you try anything complicated, let’s try these three simple manual methods that work for 90% of users.
Method 1: The “Administrator” Power Move
Sometimes, VirtualBox just needs a bit of extra “authority” to start up. Running it as an administrator often clears the error instantly.
- Find the VirtualBox shortcut on your desktop.
- Right-click it and select Properties.
- Click the Compatibility tab.
- Check the box: “Run this program as an administrator.”
- Click Apply and OK. Try opening it now!
Method 2: Clean Up the Background Processes
If a “ghost” version of VirtualBox is still running in your computer’s memory, it will block the new one from starting. We need to clear it out.
- Press Ctrl + Shift + Esc to open the Task Manager.
- Look for anything named VirtualBox, VBoxSVC.exe, or VBoxTestOGL.
- Right-click each one and select End Task.
- Restart VirtualBox.
Method 3: Reset the .VirtualBox Preferences
Your “Preferences” file might have a tiny error in it. We can “reset” it without losing your virtual machines.
- Go to your User folder (usually
C:\Users\YourName). - Find the folder named .VirtualBox (it has a dot at the beginning).
- Look for a file named
VirtualBox.xml-prev. Rename it toVirtualBox.xml(replace the old one). - Try launching the app again.
What if Your Virtual Machine Data is Corrupted?
Sometimes, fixing the software error is only half the battle. If your VirtualBox app crashed hard, it might have damaged your .vdi or .vmdk virtual disk files. If you see errors like “Disk image not found” or your VM won’t boot even after the fix, your data might be at risk.
Stop! If you have important files inside that virtual machine, don’t keep trying to restart it. You might overwrite your data.
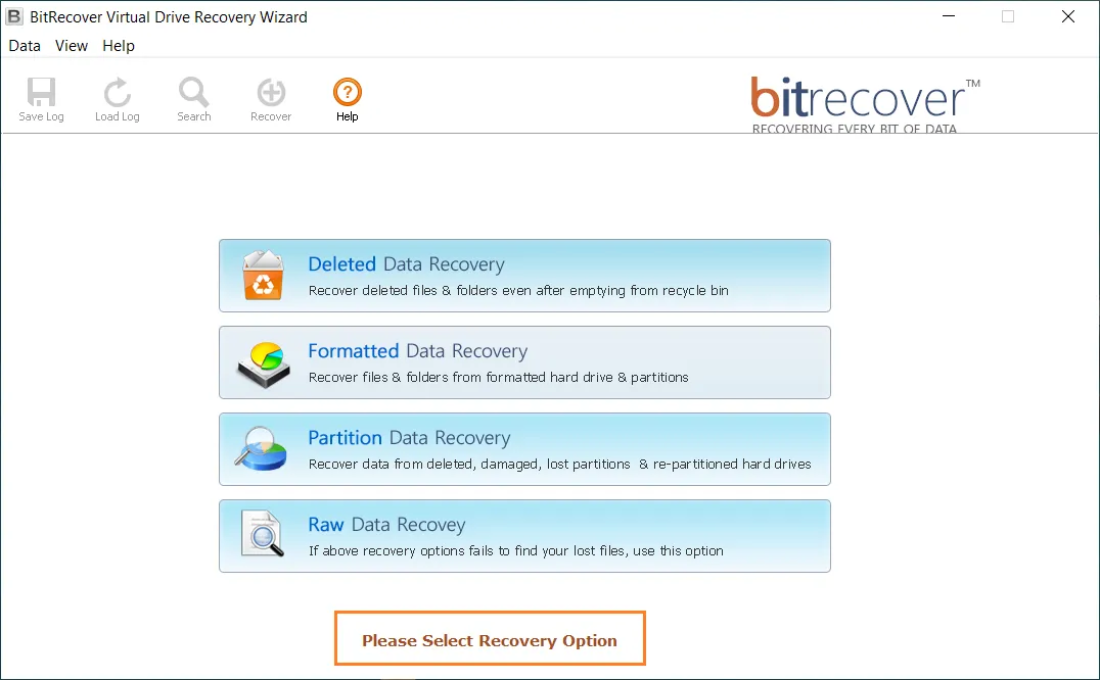
The Professional Solution: BitRecover Tool
If your virtual disks are corrupted or your VM refuses to open, the BitRecover Virtual Drive Recovery Wizard is the ultimate safety net. It is designed to go deep into the “broken” virtual disk and pull out your files safely.
- Works with any VM: Recovers data from VirtualBox (.vdi), VMware (.vmdk), and Hyper-V (.vhd).
- No VM Needed: You don’t even need VirtualBox installed to get your files back!
- Easy for Everyone: Whether you’re 15 or 50, the simple interface makes recovery as easy as 1-2-3.
- Deleted File Recovery: Even if you accidentally deleted a file inside the VM, this tool can find it.
Simple Recovery Steps Using BitRecover Software
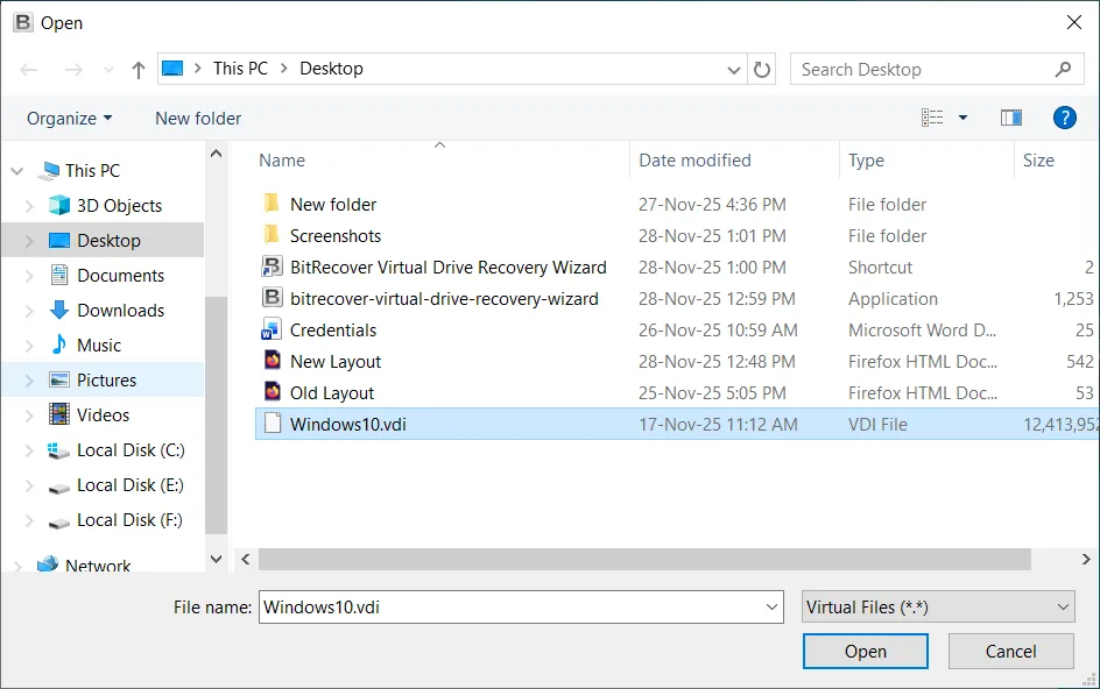
- Open the tool on your host machine.

- Select the virtual disk file (VDI, VMDK, VHD) that VirtualBox can’t boot from.

- Choose the Appropriate Recovery option for recovering data from the virtual disk file.

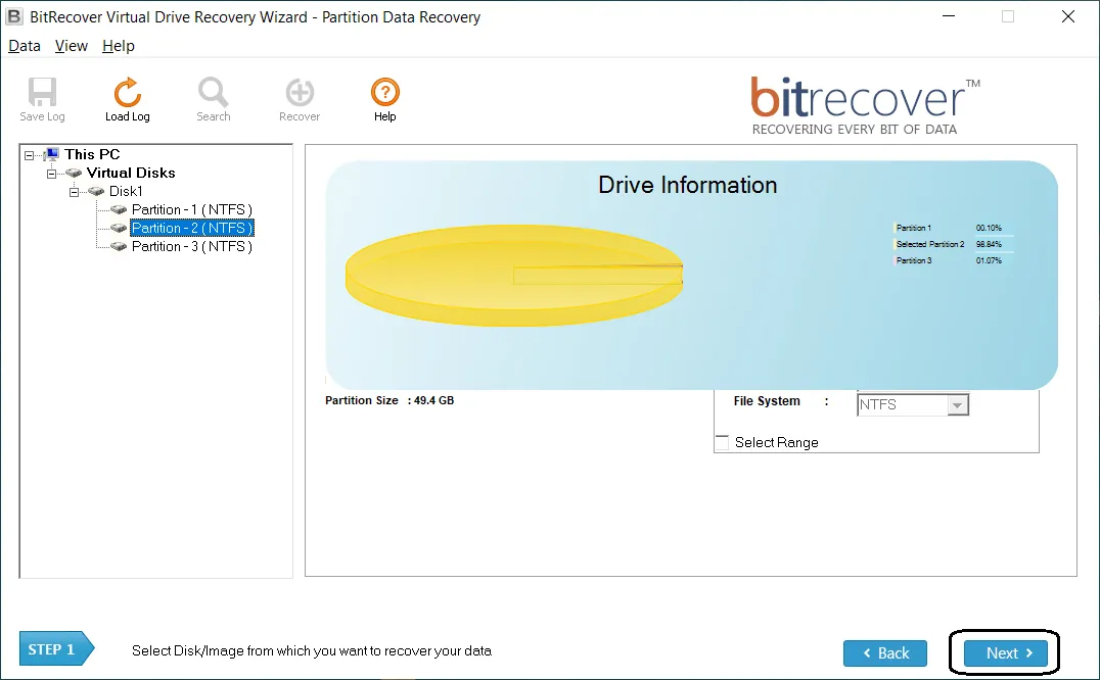
- Select & Scan the Drive Partition and wait while the software finds recoverable files.

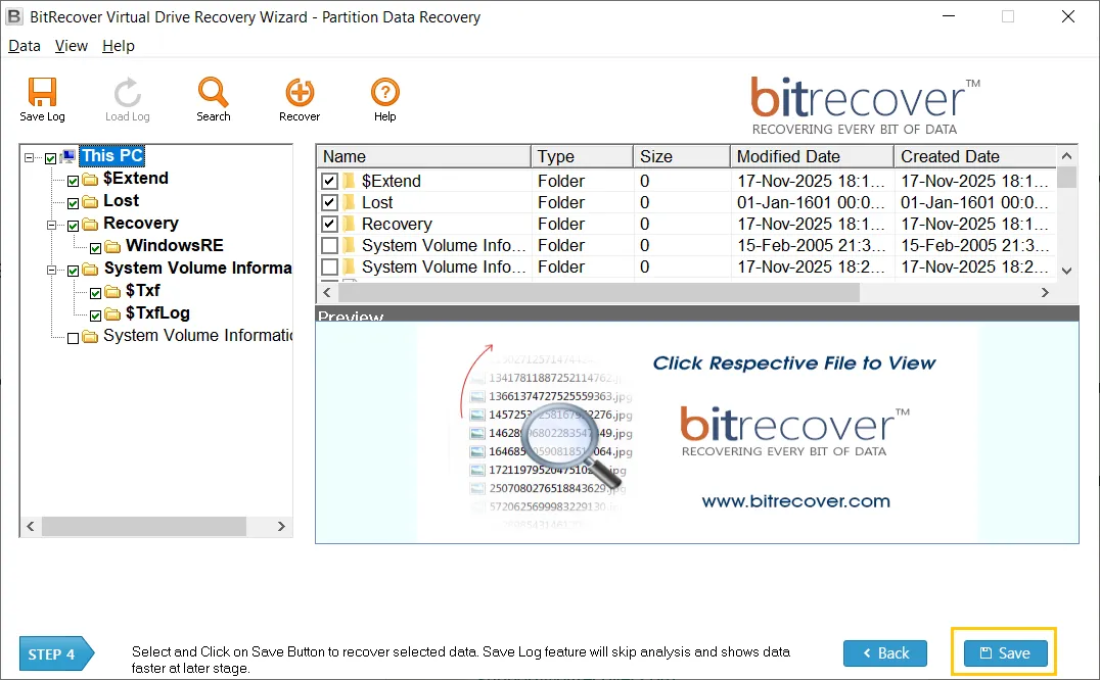
- Preview results and choose the files or folders you want to save.
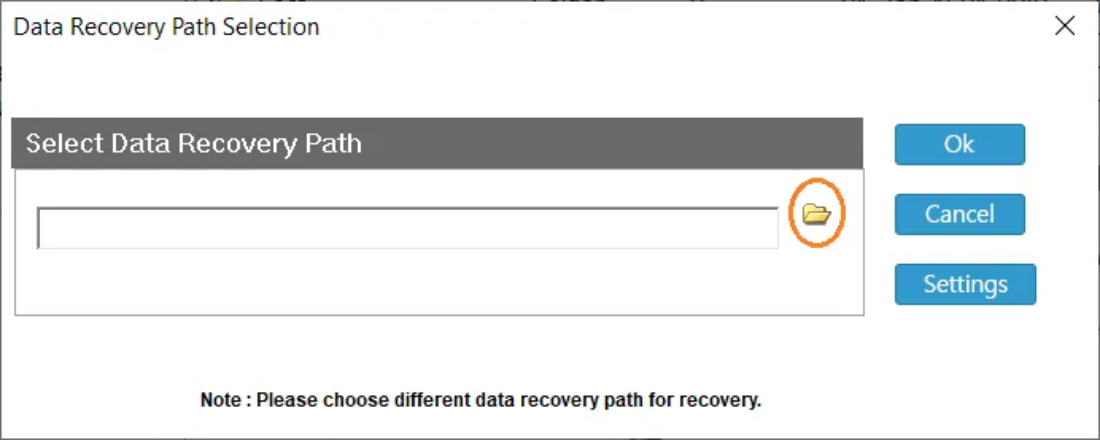
- Save recovered data to a new folder on your host.

Final Thoughts
The “Failed to acquire the VirtualBox COM object” error sounds disturbing, but it’s usually just a small setting that needs a tweak or a recheck. By running as an admin or clearing your background tasks, you’ll likely be back in your virtual world in no time.
However, if the error was caused by a system crash and your files are missing, don’t take chances. Use a trusted tool like BitRecover to save your hard work.