Hyper-V Guide: What is Hyper-V and How it Works Explained

Summary
In the rapidly evolving landscape of modern computing, virtualization stands as a cornerstone of efficiency. This guide provides a deep dive into the world of Microsoft’s virtualization legacy, starting from the origins of Microsoft Virtual Server to the powerhouse that is Hyper-V. We will explore what is Hyper-V and how it works, providing clear instructions on setting up environment, creating virtual machines, and managing storage. Furthermore, we address the critical pain point of data loss, offering a comprehensive look at how to recover data from vhdx files using both manual techniques and professional solutions like BitRecover.
The Evolution of Efficiency: From Virtual Server to Hyper-V
Before we had the sleek, integrated virtualization features we enjoy today, there was a time when server rooms were overflowing with physical hardware. Every new application required a new physical box, leading to what IT professionals affectionately (or frustratingly) called “Server Sprawl.” In the mid-2000s, Microsoft entered the fray with Microsoft Virtual Server 2005. It was a groundbreaking tool for its time, allowing IT admins to run multiple operating systems on a single host. However, it was a “Type-2” hypervisor, meaning it sat on top of the Windows operating system, which created a bottleneck for performance.
As the demand for enterprise-grade performance grew, Microsoft pivoted. They realized that virtualization needed to sit closer to the hardware. This led to the birth of Hyper-V. Introduced with Windows Server 2008, Hyper-V changed the game by becoming a “Type-1” (bare-metal) hypervisor. It transformed how businesses viewed their infrastructure, moving from rigid physical assets to fluid, scalable virtual environments. Today, whether you are a home user testing a new OS or an enterprise managing a massive data center, understanding this technology is essential.
Why Virtualization is Non-Negotiable?
Imagine being an IT Manager at a growing startup. Your budget is tight, but your developers need ten different environments to test their code. Buying ten physical servers is out of the question—the cost of hardware, electricity, and cooling would sink the ship. This is where the primary pain point lies: the need for massive scalability without the massive price tag.
Furthermore, hardware failure is an inevitable ghost in the machine. If a physical server dies, the downtime can be catastrophic. Virtualization addresses these anxieties by decoupling the software from the hardware. It allows for “Snapshots,” easy backups, and the ability to move a virtual machine from one physical host to another in seconds. But, as we will discuss later, this convenience comes with its own set of risks—specifically, the complexity of virtual disk files and the nightmare of how to recover data from vhdx when things go wrong.
What is Hyper-V and How it Works?
What was Microsoft Virtual Server?
To understand the present, we must look at the past. Microsoft Virtual Server was a virtualization solution that ran as an application on top of a Windows host OS. It managed virtual machines by intercepting hardware calls and translating them. While revolutionary, it lacked the direct hardware access required for high-performance enterprise workloads. It primarily used the .VHD (Virtual Hard Disk) format, which had a 2TB limit—a massive amount then, but a constraint today.
Defining Hyper-V
So, what is Hyper-V and how it works in the current era? Hyper-V is a hardware-based virtualization technology that allows you to create and run a software version of a computer, called a virtual machine (VM). Unlike its predecessor, Hyper-V runs directly on the system hardware. When you enable Hyper-V, the Windows “Host” OS actually runs on top of the hypervisor layer, just like the guest VMs do, though it has special privileges to manage the hardware.
Why is it Required?
- Consolidation: Reduce the number of physical servers.
- Development/Testing: Safely test software in isolated environments.
- Business Continuity: High availability and easy disaster recovery.
- Legacy Support: Run older applications that require obsolete versions of Windows on modern hardware.
How It Works: The Architecture
Hyper-V uses a partition-based architecture. The “Parent Partition” (the main Windows OS) runs the virtualization stack and has direct access to hardware. “Child Partitions” are the VMs where you install guest operating systems. They communicate with the hardware through a high-speed “VMBus,” which ensures that the VMs perform almost as fast as a physical machine.
The Virtual Storage: VHD vs. VHDX
Hyper-V utilizes two main types of virtual hard disk files:
| Feature | VHD | VHDX |
|---|---|---|
| Max Capacity | 2 TB | 64 TB |
| Corruption Resilience | Standard | High (Logging of metadata updates) |
| Performance | Standard | Optimized for modern large-sector disks |
How to Create Virtual Machine in Hyper V
Creating your first virtual environment is a straightforward process. If you are using Windows 10 or 11 Pro/Enterprise, or Windows Server, follow these steps to learn how to create virtual machine in Hyper-V:
Step 1: Enable the Hyper-V Role
- Go to “Turn Windows features on or off” in your Control Panel.
- Check the box for “Hyper-V” (ensure both Management Tools and Platform are selected).
- Restart your computer.
Step 2: Using the Hyper-V Manager
- Open the “Hyper-V Manager” from your Start menu.
- On the right-hand panel, click New > Virtual Machine.
- Follow the Wizard: Give your VM a name, choose “Generation 2” (for modern OS support), and assign Memory (RAM).
- Configure Networking: Choose a Virtual Switch (usually “Default Switch”).
- Connect Virtual Hard Disk: This is where you create your .vhdx file. Specify the size you need.
- Installation Options: Select “Install an operating system from a bootable image file (.iso)” and point it to your OS installer.
- Finish the wizard, right-click your new VM, and select “Connect,” then “Start.”
Challenges in Recovering Data from Virtual Disks
While Hyper-V is robust, it is not invincible. The VHDX file is a complex container. If the file structure is damaged, the entire virtual machine becomes a “black box” that you cannot open. Users often face several hurdles when trying to figure out how to recover data from vhdx files that have gone rogue.
Common Errors and Symptoms
- “The file or directory is corrupted and unreadable.” – Occurs when trying to mount the VHDX.
- “Virtual Disk not found” – The hypervisor fails to recognize the storage path.
- “The sector size of the physical disk is unsupported” – Compatibility issues after a hardware migration.
- Blue Screen of Death (BSOD) inside the VM, leading to file system corruption.
Causes of Inaccessibility
- Sudden Power Outage: If the host shuts down while the VM is writing data, the VHDX header can be corrupted.
- Malware/Ransomware: Attacks targeting the host can encrypt or damage the virtual disk files.
- Deleted Snapshots: Accidentally deleting an .avhdx (checkpoint) file can break the chain of data, making the parent VHDX unusable.
- Storage Failures: Bad sectors on the physical hard drive where the VHDX is stored.
DIY Checklist: Manual Methods to Retrieve Data
If you find yourself in a situation where your VM won’t boot, don’t panic yet. Here is a quick checklist of manual methods to attempt data retrieval:
Warning: Always create a backup copy of your VHDX file before attempting any manual recovery steps.
Method 1: Mounting via Disk Management
- Right-click the “Start” button and select “Disk Management.”
- Click Action > Attach VHD.
- Browse to your VHDX file and click OK.
- If the file system is healthy, it will appear as a new drive letter in File Explorer.
Method 2: Using PowerShell (Mount-VHD)
Sometimes the GUI fails, but the command line succeeds. Open PowerShell as Administrator and type:
Mount-VHD -Path "C:\YourPath\VirtualDisk.vhdx" -ReadOnly
Adding the -ReadOnly flag prevents further corruption during the attempt.
Method 3: The CHKDSK Approach
If the disk mounts but tells you it needs formatting, DO NOT format it. Instead, identify the assigned drive letter (e.g., E:) and run:
chkdsk E: /f
Limitations and Risks of Manual Recovery
While manual methods are free, they are often insufficient for serious issues. Before you spend hours on DIY fixes, consider these disadvantages:
- No Support for Deleted Files: Manual mounting cannot recover files that were deleted inside the VM before it crashed.
- Permanent Data Loss: Using
chkdskon a corrupted virtual disk can sometimes “fix” the file system by deleting the very data you are trying to save. - Complex Snapshots: Manual methods struggle with “Differencing Disks” (.avhdx). If the link is broken, manual mounting won’t show you the most recent data.
- Format Requirements: If the VHDX header is severely damaged, Windows will simply refuse to mount it, leaving you with no options.
The Professional Alternative: BitRecover
When manual methods hit a wall, enterprise-grade problems require professional solutions. The BitRecover VHD Recovery Wizard is specifically designed to handle the intricacies of virtual disk corruption. It bypasses the need for the Hyper-V hypervisor entirely, reading the raw data directly from the .vhd or .vhdx file.
Whether you are dealing with a formatted virtual partition, a crashed host system, or accidental deletion of files within the VM, this tool provides a safe, read-only recovery environment.
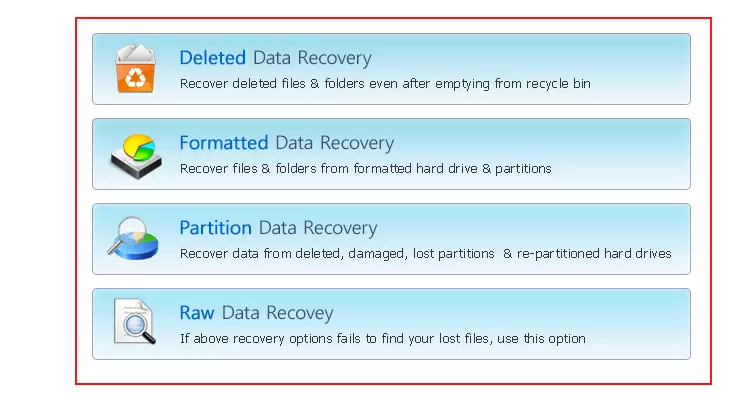
Professional Choose BitRecover:
- Universal Support: Works with VHD, VHDX, and AVHDX (snapshot) files.
- Multiple Recovery Modes: Features specific modes for Deleted Data, Formatted Drives, and Corrupted Partitions.
- No Hyper-V Required: You don’t need to have Hyper-V installed or even a working Windows Server to extract your data.
- Search and Preview: Allows you to preview images, documents, and folders before committing to the recovery.
Do’s and Don’ts for Virtual Machine Management
Do’s
- Regularly export your VMs as a secondary backup.
- Use VHDX instead of VHD for better power-failure resilience.
- Keep your Host OS updated to the latest integration services.
- Monitor physical disk health where VHDX files reside.
Don’ts
- Don’t keep too many snapshots (checkpoints) as they degrade performance and complicate recovery.
- Don’t store VHDX files on the same drive as the Host OS.
- Never “Expand” or “Shrink” a virtual disk if it shows signs of corruption.
- Avoid using “Dynamic” disks for high-transaction databases if performance is the priority.
Real-World Use Case: The “Monday Morning” Crisis
Scenario: A medium-sized accounting firm runs its entire payroll database on a Windows Server 2019 VM. On a stormy Sunday night, a power surge bypasses the UPS, causing the host server to hard-reboot. On Monday morning, the payroll VM refuses to start, throwing the error: “The chain of virtual hard disks is corrupted.”
The Attempt: The IT admin tries to mount the .vhdx file in Disk Management. It fails with a “Parameter is incorrect” error. They try PowerShell, but the VHDX is recognized as “Unknown/Uninitialized.”
The Solution: The admin downloads the BitRecover utility. They point the software to the base .vhdx and the latest .avhdx snapshot. The software successfully reassembles the data tree. Within 45 minutes, the payroll database (a 50GB SQL file) is extracted to an external drive. The firm processes payroll on time, and the IT admin is the hero of the day.
Hyper-V vs. The Competition: A Brief Analysis
How does Hyper-V stack up against other giants like VMware or VirtualBox? While VirtualBox is great for beginners and VMware is a powerhouse in the Linux world, Hyper-V has a distinct advantage: Windows Integration. Because it is built into the OS, it manages Windows Guest VMs with unparalleled efficiency. Furthermore, for businesses already paying for Windows Server licenses, Hyper-V is essentially “free,” providing a lower Total Cost of Ownership (TCO).
The Future: AI and Virtualization
As we look toward the future, Artificial Intelligence is beginning to play a massive role in how Hyper-V operates. Modern hypervisors are starting to use AI-driven “Predictive Analysis” to move virtual machines automatically before a physical hardware component fails. In terms of data recovery, AI algorithms are being integrated into tools to better “guess” and reconstruct fragmented file headers in corrupted VHDX files, making the process of how to recover data from vhdx even more successful.
Frequently Asked Questions (FAQ)
Q: Can I run Hyper-V on Windows 10 Home?
No, Hyper-V is only available on Pro, Enterprise, and Education editions. Home users typically use VirtualBox or VMware Workstation Player.
Q: What is the difference between a Checkpoint and a Backup?
A checkpoint is a “point-in-time” state of a VM, mainly for short-term use (like before an update). A backup is a separate copy of the data stored elsewhere. Checkpoints are not backups and can actually make recovery harder if the disk becomes corrupted.
Q: Is it possible to recover files from a formatted VHDX?
Yes, but not through Windows’ built-in tools. You would need a professional tool like BitRecover, which can scan the raw sectors of the virtual disk to find traces of the original files.
Conclusion
Understanding what is Hyper-V and how it works is no longer just for server admins—it is vital knowledge for anyone looking to maximize their computing resources. While the technology offers incredible flexibility, the reliance on single-file containers like VHDX means that the stakes for data loss are high. By mastering how to create virtual machine in Hyper-V and keeping a reliable recovery tool like BitRecover in your arsenal, you can enjoy all the benefits of virtualization with the peace of mind that your data remains safe, no matter what happens to the underlying hardware.
