How to Export Yandex Mail to PST Effortlessly: Master Guide

Published: May 8th, 2026 • 7 Min Read
Summary: In this era of digital migration, moving your data safely is a top priority. This guide provides an in-depth walkthrough on how to Export Yandex Mail to PST. We explore the technical challenges of manual synchronization, the necessity of local backups, and why a professional automated solution like BitRecover is often the most reliable path for users worldwide.
Is Your Yandex Mail Trapped in the Cloud?
Let’s face it: relying solely on cloud-based email services can feel like walking on a tightrope. One fine morning, you might find yourself locked out due to regional restrictions, or perhaps your business is transitioning to the Microsoft ecosystem. If you have been searching for a way to Export Yandex Mail to PST, you are likely feeling the pressure of potential data loss or the frustration of a sluggish web interface. Whether you are a home user in New York or a system administrator for a global enterprise, the need to have a local, accessible, and secure backup of your emails in the Outlook-friendly PST format is a common pain point that demands a clear solution.
What Does It Mean to Export Yandex Mail to PST?
To understand the process, we first need to look at the components. Yandex Mail is a popular cloud-based service, while a PST (Personal Storage Table) file is the proprietary format used by Microsoft Outlook to store copies of messages, calendar events, and other items. When you Export Yandex Mail to PST, you are essentially creating a portable archive of your entire mailbox.
Why and When is This Required?
- Transition to Microsoft Outlook: Most corporate environments in the USA and Europe prefer Outlook for its advanced scheduling and integration features.
- Compliance and Legal Needs: Businesses often require local copies of email communications for legal discovery or regulatory audits.
- Data Sovereignty: Given the geopolitical shifts affecting various tech platforms, many users want to move their data from Russian-based servers to local drives.
- Storage Management: Yandex has storage limits. Moving older emails to a PST file helps declutter your cloud storage without deleting history.
The Roadblocks: Challenges When Exporting Manually
While the idea sounds simple, many users hit a brick wall when they try to Export Yandex Mail to PST using traditional methods. It isn’t always as “plug-and-play” as we’d like.
Common errors include the “IMAP Connection Failed” message or the “Authentication Error” even when you know your password is correct. Users frequently complain about incomplete folder synchronization, where only the Inbox migrates, leaving Sent items and custom folders behind. Furthermore, Yandex’s strict security protocols often block third-party access, leading to a loop of login requests that never seem to end.
Symptoms, Causes, and the Ripple Effect
How do you know things are going wrong? Usually, it starts with Outlook hanging at “Synchronizing Folders” for hours. The cause is often rooted in the “Less Secure Apps” setting or the requirement for a specific “App Password” rather than your standard login. The implications are significant: missed deadlines, loss of critical attachments, and hours of wasted productivity trying to troubleshoot server settings that seem to change without notice.
Quick DIY Checklist Before You Begin
- Enable IMAP access in your Yandex Mail settings.
- Generate a unique Yandex “App Password.”
- Ensure you have a stable internet connection.
- Check if your Microsoft Outlook version is updated.
- Ensure sufficient disk space for the resulting PST file.
The Manual Way: Step-by-Step Configuration
If you prefer the DIY route, you can Export Yandex Mail to PST by configuring Yandex within Microsoft Outlook and then using the Export wizard. Here is how you do it:
Step 1: Prep Your Yandex Account
Log into Yandex Mail via a browser. Go to Settings > All Settings > Email Programs. Check the boxes for “From the imap.yandex.com server via IMAP” and save changes.
Step 2: Create an App Password
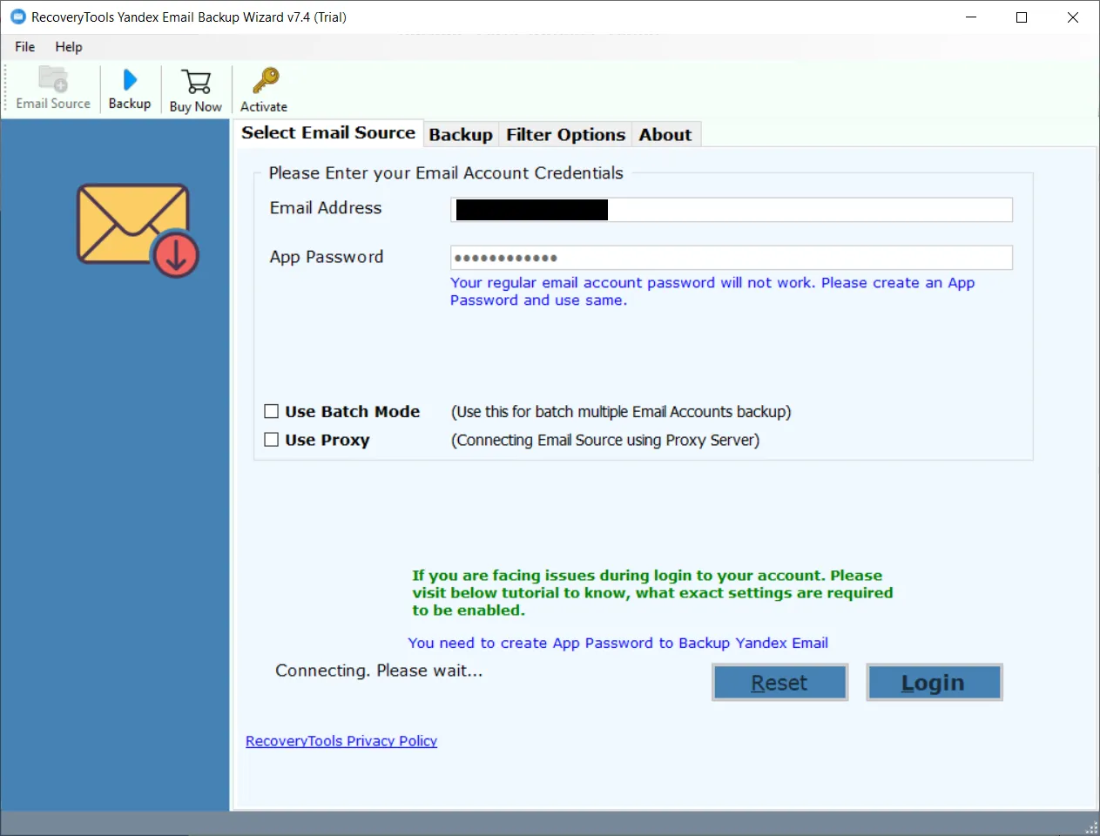
Yandex will not let you use your main password in Outlook for security reasons. Go to your Account Management page, find Passwords and Authorization, and select App Passwords. Choose “Mail” and “Outlook” to generate a 16-character code.
Step 3: Connect to Outlook
Open Outlook, go to File > Add Account. Enter your Yandex email, select “Manual Setup,” and choose IMAP. Use imap.yandex.com (Port 993, SSL) for incoming and smtp.yandex.com (Port 465, SSL) for outgoing. Use the App Password you just created.
Step 4: Export to PST
Once synced, go to File > Open & Export > Import/Export. Select “Export to a file” and then “Outlook Data File (.pst).” Choose your Yandex folders and hit finish.
Essential Precautions
Before you dive into the manual steps, remember: always keep a backup of your data. Manual synchronization can sometimes result in “Two-way Sync” issues where deleting a folder in Outlook accidentally deletes it from the Yandex server. Also, ensure your computer doesn’t enter sleep mode during a large export, as this can corrupt the PST file structure.
The Do’s and Don’ts of Email Migration
| Do’s | Don’ts |
|---|---|
| Verify the folder hierarchy after export. | Don’t use the main account password for IMAP. |
| Use a dedicated App Password. | Don’t try to export 50GB+ mailboxes manually. |
| Check the ‘Include Subfolders’ box. | Don’t interrupt the synchronization process. |
Weighing the Options: Pros and Cons
The Manual Method
Pros: It is free to use and doesn’t require downloading third-party software if you already have Outlook.
Cons: High risk of data loss, extremely slow for large mailboxes, and technically complex for non-IT users.
The Professional Method
Pros: Guaranteed data integrity, preserves folder structure, works at high speeds, and doesn’t require Outlook installation.
Cons: Requires a software purchase (though it offers a free trial).
When to Switch to a Professional Solution?
If you are dealing with thousands of emails, multiple accounts, or simply cannot afford a single error, the manual method is a gamble. This is where a specialized tool becomes a necessity rather than a luxury. To Export Yandex Mail to PST with 100% accuracy, we highly recommend the BitRecover Yandex Backup Wizard.
The is designed to handle the heavy lifting for you. Unlike the manual process, it doesn’t require you to configure Outlook. You simply enter your Yandex credentials, select your folders, and the software generates a healthy PST file in minutes. It is built for speed, security, and simplicity, making it the go-to choice for IT professionals across the globe.
Comparative Study: Manual vs. BitRecover
In our testing, a 10GB Yandex mailbox took nearly 6 hours to sync via Outlook, with several connection timeouts. The same mailbox was processed by the BitRecover tool in under 45 minutes without a single hiccup. For business users where time is literally money, the choice is clear.
Frequently Asked Questions
Q: Does Yandex charge for IMAP access?
A: No, Yandex provides IMAP access for free, but you must enable it in the settings manually.
Q: Can I export Yandex Mail without Outlook?
A: Yes, by using the BitRecover utility, you can create a PST file without ever opening or installing Microsoft Outlook.
Q: Will my folder structure remain the same?
A: While manual methods often struggle with this, professional tools are designed to maintain the exact folder hierarchy of your Yandex Mail.
Final Thoughts
Learning how to Export Yandex Mail to PST is an essential skill for anyone looking to modernize their workflow or secure their digital legacy. While the manual IMAP configuration offers a free entry point, the technical hurdles and time consumption can be overwhelming. For a seamless, stress-free experience that ensures every attachment and metadata detail is preserved, leveraging BitRecover as your professional utility tool is the smartest move you can make. Take control of your data today and ensure your communications are always within reach, regardless of where the cloud takes you.
